Larduino Mini
Introduction
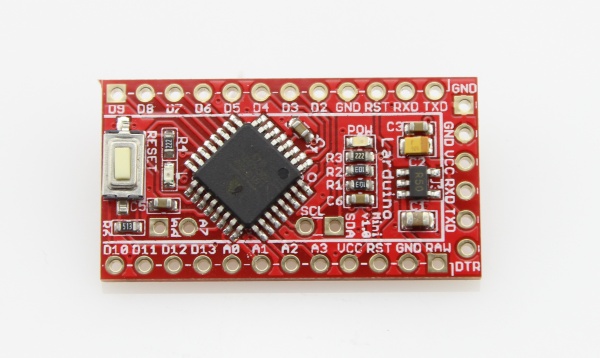
Larduino Mini is a new Arduino mainboard compatible with original Arduino interfaces. Larduino Mini compatible to Arduino existing program, shield and IDE.
In addition, it has more special function. it can working on overclocking state in some applications, the maximum operating frequency is 32Mhz, which is two times the ordinary Arduino.
Programable internal 32MHz calibrated oscillator can help you achieve the seamless switching operating frequency(125Khz to 32Mhz) in your application.
Larduino Mini cost low, but powerful, it can satisfy the user demand for low cost DIY.
Features
- Ultra low price, high performance.
- Compatible to Arduino existing program, shield and IDE.
- Compatible to original Arduino Pro Mini layout and dimension.
- Operating clock can reach up to 32MHz(default:16Mhz).
- Programable internal 32MHz Calibrated Oscillator.
- Surport operating voltage: 3.3V/5V.
- I2C and Serial Grove compatible connector.
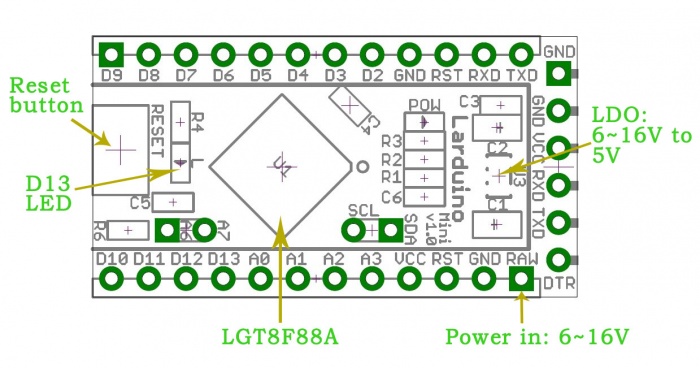
- Wide input voltage range(RAW Pin):6-16V.
- Internal temperature sensor.
Interface Function
Specifications
| Processor | LGT8F88A |
|---|---|
| Flash Memory | 8 KB |
| SRAM | 2 KB |
| Data FLASH(EEPROM like) | 504 Byte |
| Maximum operating clock | 32 Mhz |
| Operating voltage | 1.8~5.5 V |
| IO pin drive current MAX(Output) | 63.1 mA(1) |
| IO pin drive current MAX(Sink) | 80 mA(2) |
(1)\(2):Surported Pin: D0~D5, with special setting by LarduinoIOEnhance library (Has been included in the Larduino_Mini_Support_Package). Normally the drive current is 12.3mA(Sink) and 36.8mA(Output).
Electrical characteristics
| Parameter | Min. | Typical | Max. | Uint |
|---|---|---|---|---|
| Supply voltage(RAW Pin) | 6 | 7 | 16 | V |
| Supply voltage(VCC Pin) | 2.0 | 5 | 5.3 | V |
| HBM ESD | - | 4000 | - | V |
| Temperature | -40 | 25 | 85 | C |
How to use?
Step 1: Install new version Arduino IDE in your computer.
(Surport Arduino 1.0.X and Arduino 1.5.X)
Step 2: Download the Larduino Mini Support Package.
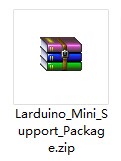
Step 3: Install Larduino Mini Support Package to Arduino IDE:
PS: Before do this, please make sure your Arduino IDE is closed.
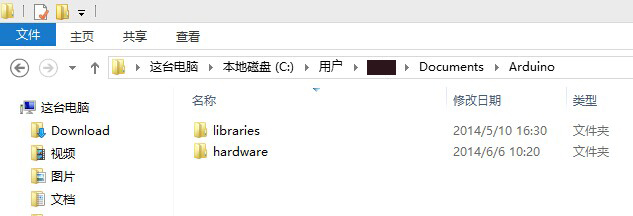
Unzip the support package file, and move the two Folders(libraries and hardware) to:
MacOSX: /Users/user/Documents/Arduino
Windows: C:\Users\<USERNAME>\Documents\Arduino
Linux/Ubuntu: /home/<USERNAME>/sketchbook
You can check Arduino->File->Preferences to find your support file installation directory. 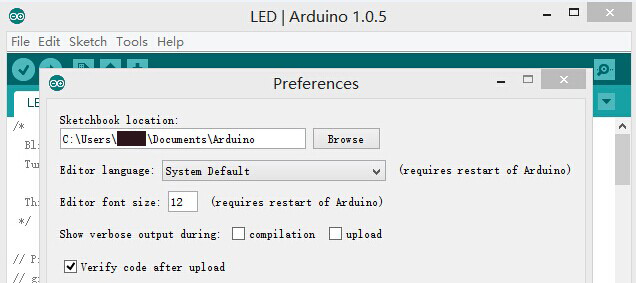
In my OS, the support package Installed here.
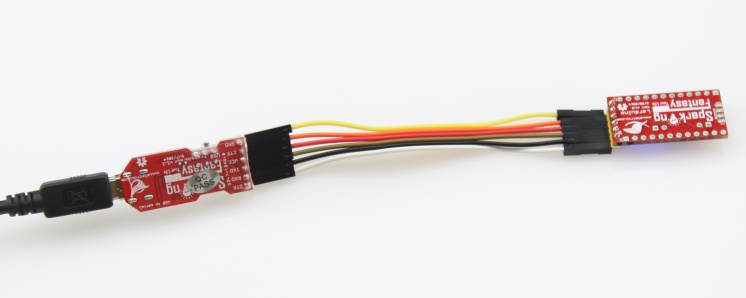
Step 4: Connect Larduino board to your computer with a USB-Serial adapter and USB cable.
We recommend you to use our USB Transformer, if you used other USB-Serial adapter, please skip step 5, find and Install your hardware driver by yourself.
Step 5: Install the driver of the USB Transformer in your OS.
Detailed installation please refer to our WIKI of USB Transformer.Step 6: After the driver installation is complete, open the Arduino IDE.
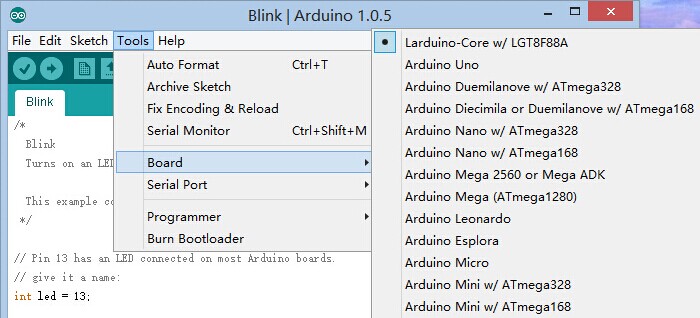
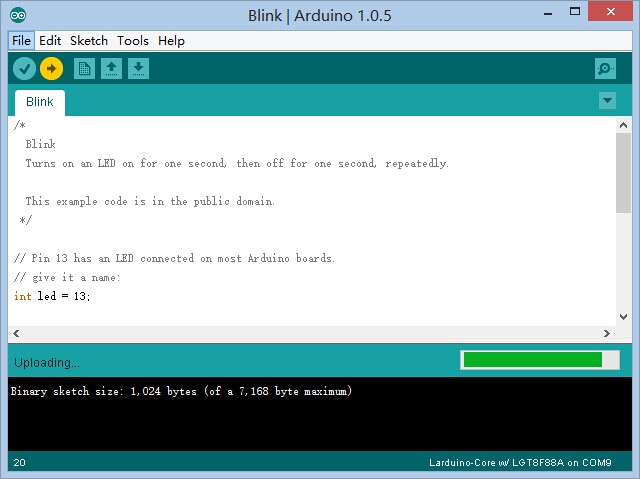
- Select the board: Click Tools -> Board -> Larduino-Core w/ LGT8F88A.
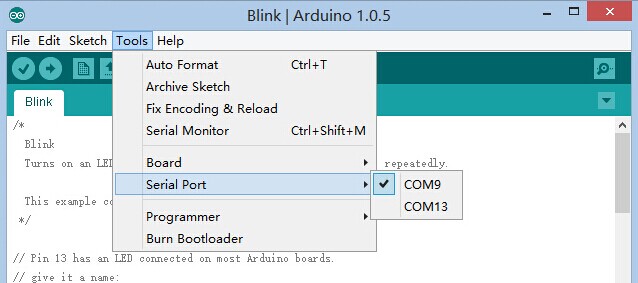
- Select the COM: Click Tools -> Serial Port -> COMX(which connected with Larduino Mini.)
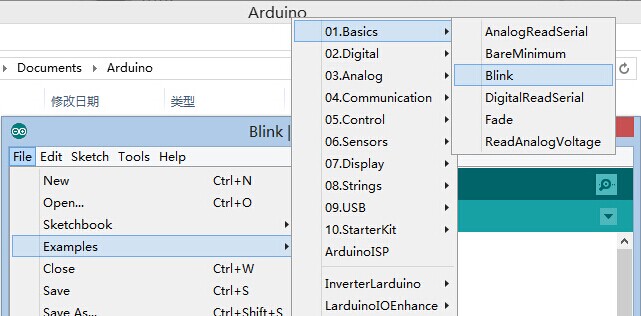
 Step 7: An example of program: Click File -> Examples -> which you want.
Now, let's do a LED flash test.1. Open the blink example.
2. Upload the blink example to Larduino.
3. LED is flashing.
Enjoy yourself! 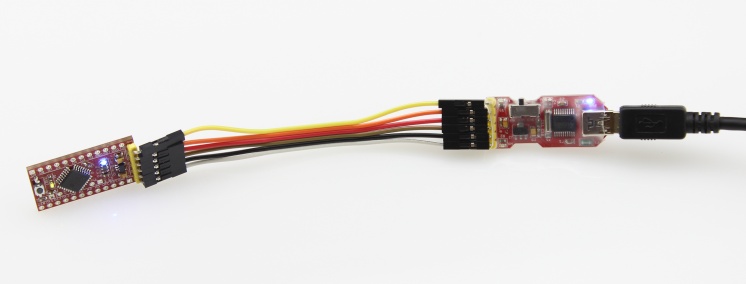
PS:
The flash size of the Larduino Mini is 7168 Byte(include bootloader), so some of the bigger application may not support at now.
We will launch bigger flash size version of Larduino in the near future, please pay attention to us.
Author: Joney
E-mail: joney.s@foxmail.com
Sparking Work Space
Version Tracker
| Revision | Descriptions | Release Date |
|---|---|---|
| Larduino Mini v0.9b | 1. Initial public release | Mar 13, 2014 |
| Larduino Mini v1.0 | 1. Modify the logo position. | May 8, 2014 |
