Wizee HMI touch display
Description
Wizee stands for WYSIWYG, what you see is what you get. We name this series Wizee because it comes with a graphical programming software. Users can freely arrange existing graphics and burn them into the screen, and the corresponding program will be displayed on the screen.
Wizee HMI touchable serial displays adopt the 400M SOC processor, makes the screen runs faster, and it can run after power is on. Wizee supports a variety of configuration controls, and conventional configuration controls can meet 95% of the user's needs. LUA script programming is supported, and logic and algorithms are run inside the screen to reduce communication frequency. At the same time, its power consumption is low. When the backlight is in the darkest mode, the processor runs at about 0.4w at full speed, and the sleep mode can be as low as 0.17w.
Product Comparison
| Product Name | Wizee 2.4 inch HMI Display | Wizee 2.8 inch HMI Display | Wizee 3.5 inch HMI Display | Wizee 4.3 inch HMI Display | Wizee 5 inch HMI Display | Wizee 7 inch HMI Display |
|---|---|---|---|---|---|---|
| Communication Method | TTL | RS232(short circuit J5 change to TTL ) | RS232(short circuit J5 change to TTL ) | TTL | RS232(short circuit J5 change to TTL ) | RS232(short circuit J5 change to TTL ) |
| Resolution | 240*320 | 240*320 | 320*480 | 480*272 | 800*480 | 800*480 |
| Storage | 8MB | 16MB | 16MB | 8MB | 16MB | 16MB |
| Flash | 8MB | 16MB | 16MB | 8MB | 16MB | 16MB |
| RAM(DDR SDRAM) | 32MB | 32MB | 32MB | 32MB | 32MB | 32MB |
| Music player | Not support | MP3 audio format (speaker 4Ω2W, mono), share storage space with pictures. | Not support | Not support | MP3 audio format (speaker 4Ω2W, mono), share storage space with pictures. | MP3 audio format (speaker 4Ω2W, mono), share storage space with pictures. |
| Active Area | 49.0mm*36.7mm | 57.6mm*43.4mm | 73.9mm*49.4mm | 96.0mm*54.9mm | 108.9mm*65.8mm | 155.0mm*87.0mm |
| Appearance Dimension | 76.3mm(L)*47.2mm(W)*11.9mm(H) (MAX, including TP) | 87.0mm(L)*56.5mm(W)*11.9mm(H)(MAX, including TP) | 103.9mm(L)*60.9mm(W)*11.9mm(H)(MAX, including TP) | 122.3mm(L)*73.5mm(W)*14.6mm(H)(MAX, including TP) | 143.5mm(L)*81.0mm(W)*16.4mm(H)(MAX, including TP) | 188.9mm*105.1mm*16.8m (MAX, including TP) |
| Real Time Clock(RTC) | Not support | Not support | Not support | Not support | Support clock, timer, countdown and other functions | Support clock, timer, countdown and other functions |
| Audio Connector Specifications | None | PH2.0-2P | None | None | PH2.0-2P | PH2.0-2P |
| Voltage | 5V | 4.5-15V | 4.5-15V | 5-18V | 4.5-30V | 4.5-30V |
| Screen Type | HD screen | HD screen | IPS screen | HD screen | HD screen | HD screen |
Quick Get Start
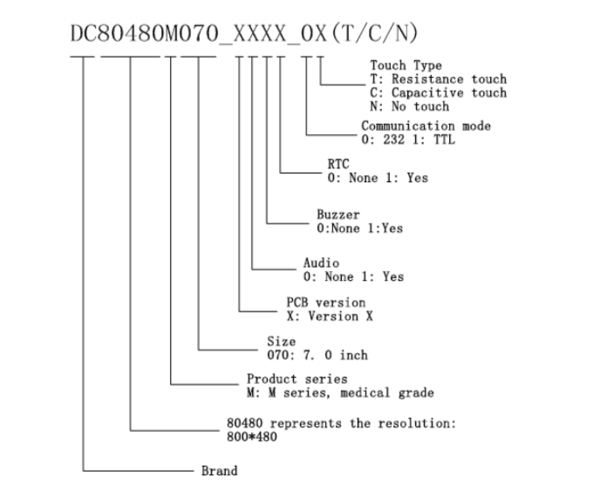
Type Name Meaning
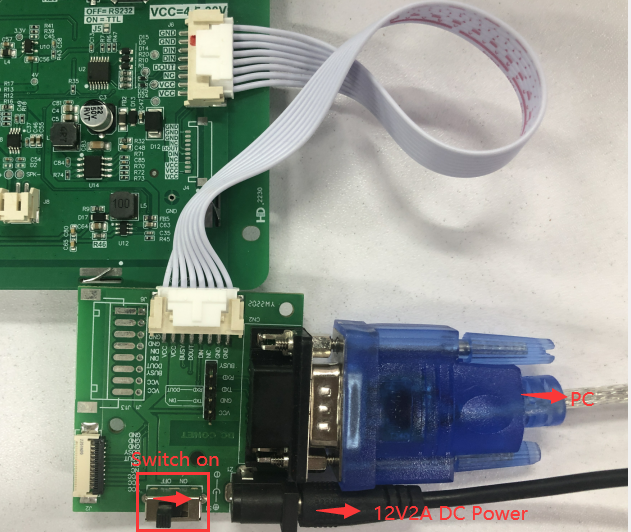
Hardware connection
VisualTFT
Download link: VisualTFT
Select English and the installation directory according to the prompts, and click "next" step by step to complete the installation.
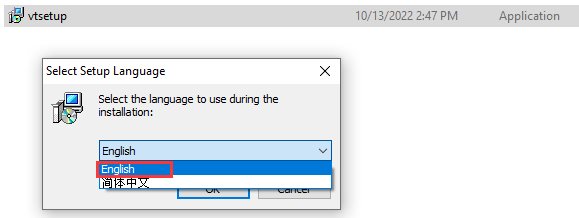
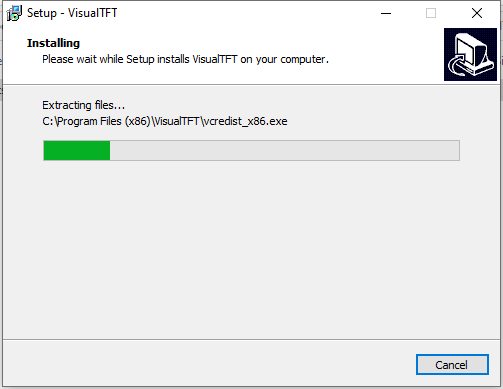
The installation process is as follows
Introduction to Visual TFT software operation interface 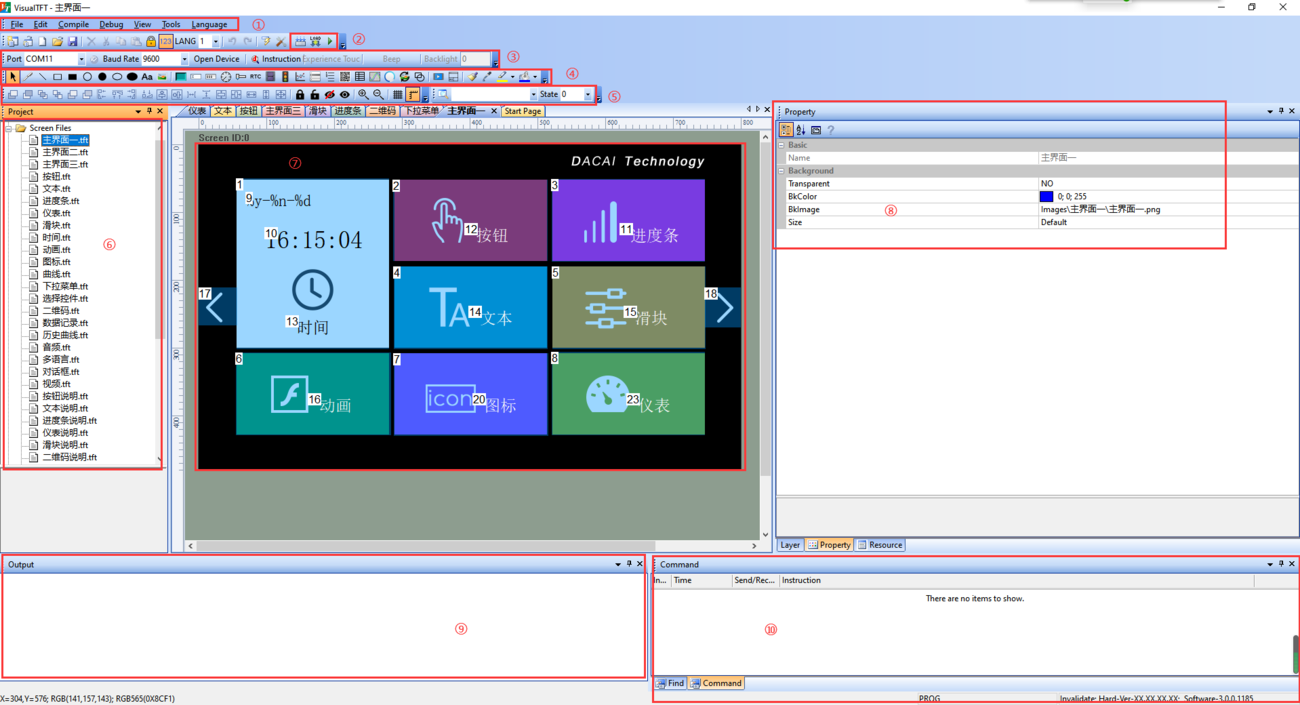
① Menu bar area

Debug
1.It is used for serial port debugging. When the screen is not Wizee protocol, the online operation fails. At this time, click Debug → Connect Device(No Handshake) in the menu bar, and you can view the interaction of serial port commands in Command Window
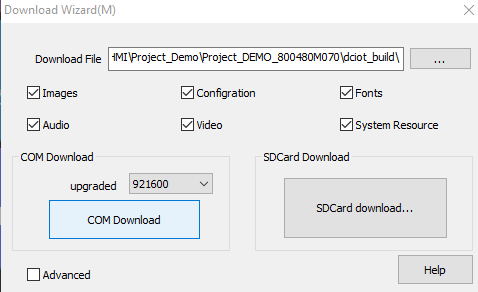
2.Download project to the HMI display. Click Debug → Download Resource, and click COM Download(make sure the Wizee is connected with VisualTFT)
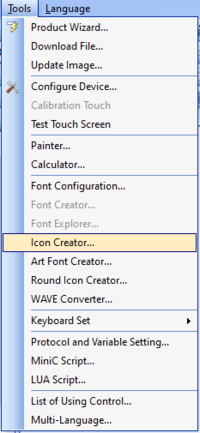
Tools
| Tool | Description |
|---|---|
| Product Wizard | Download files to Wizee Display |
| Icon Creator | Create icon files |
| Art Font Creator | Create vector font |
| Keyboard Set | Customizing user keyboard styles |
| Protocol and Variable Setting | Configuration of modbus/fx2n/xgus protocol |
| MiniC Script | After the modbus/fx2n/xgus protocol is enabled, the logic lightweight script can be edited |
| LUA Script | The application of lua script, which is used for powerful applications such as computing and private serial port protocol |
| Name | Description |
|---|---|
| Compile Project | You can see the editing results and the size of the space used in the Output window |
| Download to device | Basic type, click to download through miniusb port, while mass production download interface will pop up for other series, and you can select serial port or SD card/U disk to download |
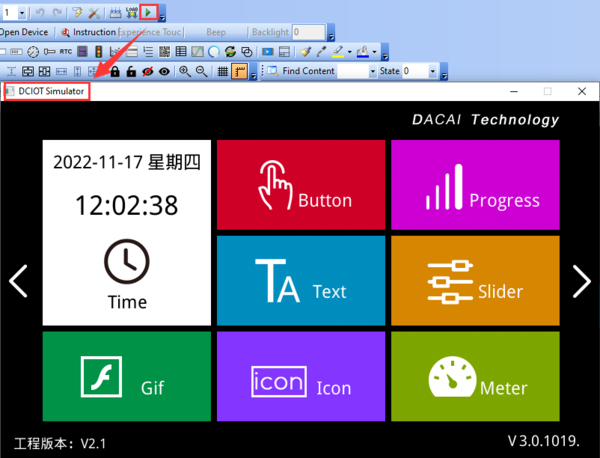
| Run Simulator | Simulate the running logic of the physical screen with the configured page |
③ Control Area

Select the com port corresponding to the Wizee, and the device will connect. After the connection is successful, it will be displayed in the lower right corner.
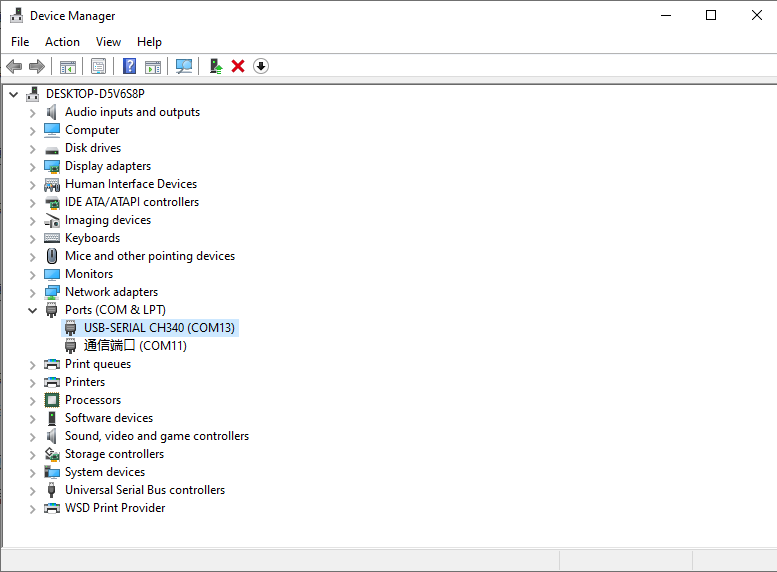
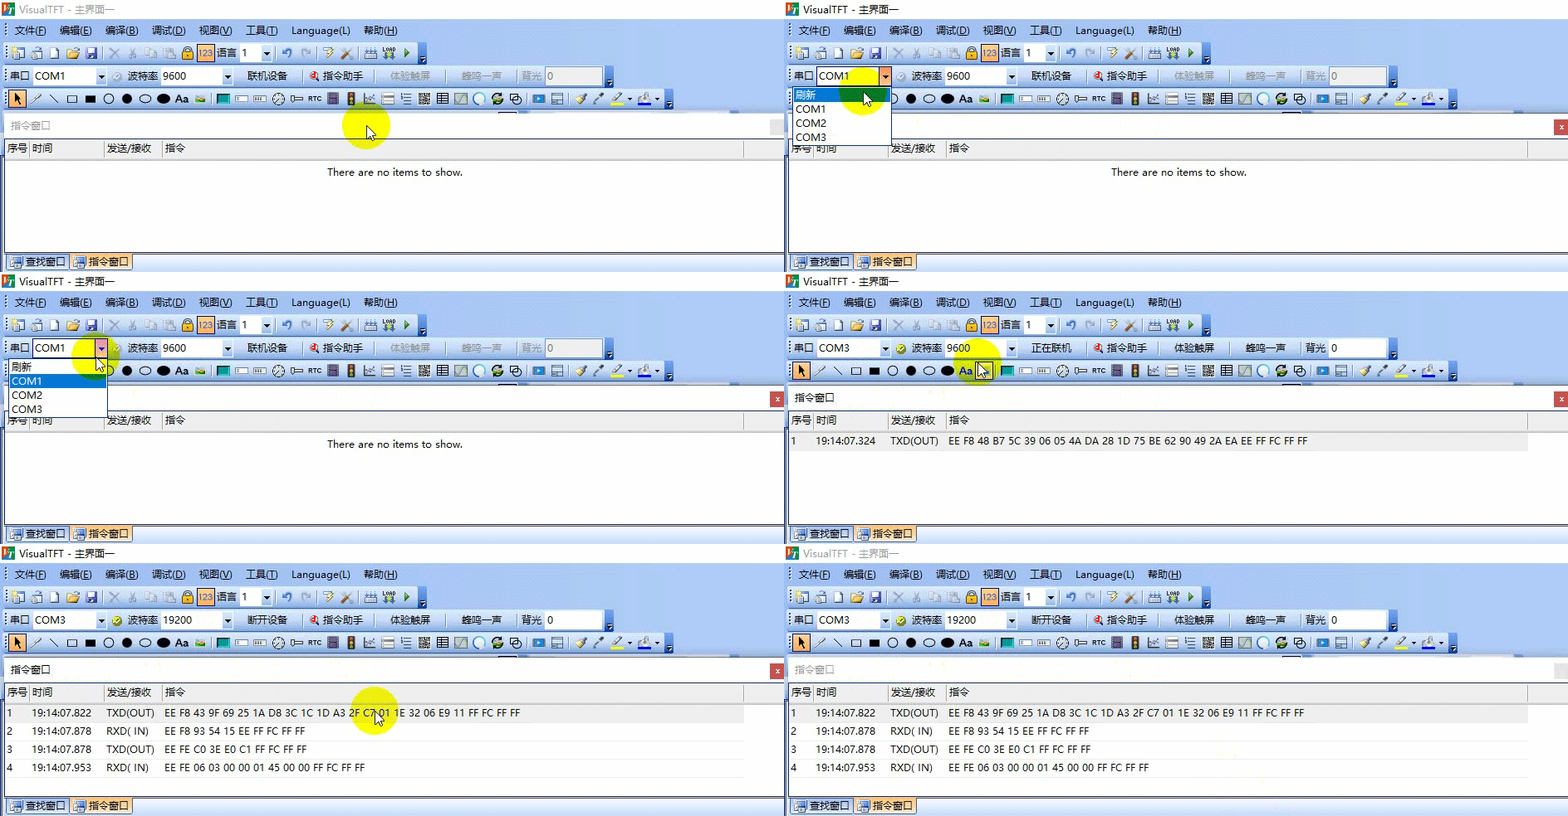

④the Controls Area
Controls are mainly divided into basic controls and configuration controls
The basic controls are as follows: brush, line segment, rectangular box, filled rectangle, circle, filled circle, ellipse, filled ellipse, static text, picture, etc

The configuration controls are as follows: button, text, instrument, slider, RTC, animation, icon, curve, menu, sliding selection, QR code, data record, historical curve, circular progress bar, basic graphics, video, sub screen window controls, etc

⑤ Controls Layout
It is used to adjust the height and distribution of the upper and lower stacked display, alignment, spacing, equal width, etc. between controls, and to lock, hide, zoom in and out during the picture layout process

⑥ Project Window You can view the list of created pictures and loaded pictures, audio, video and other files
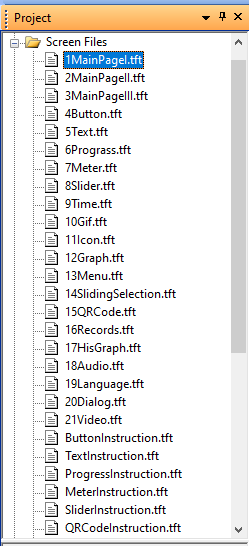
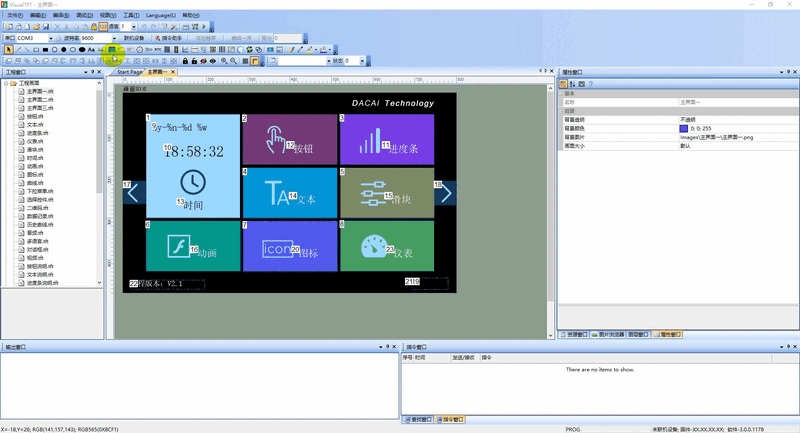
⑦ Edit Area
It is mainly responsible for editing the UI interface and the main operation areas in development. The user clicks to select the desired controls and places them in this area, which completes the creation of controls. The specific operations are as follows 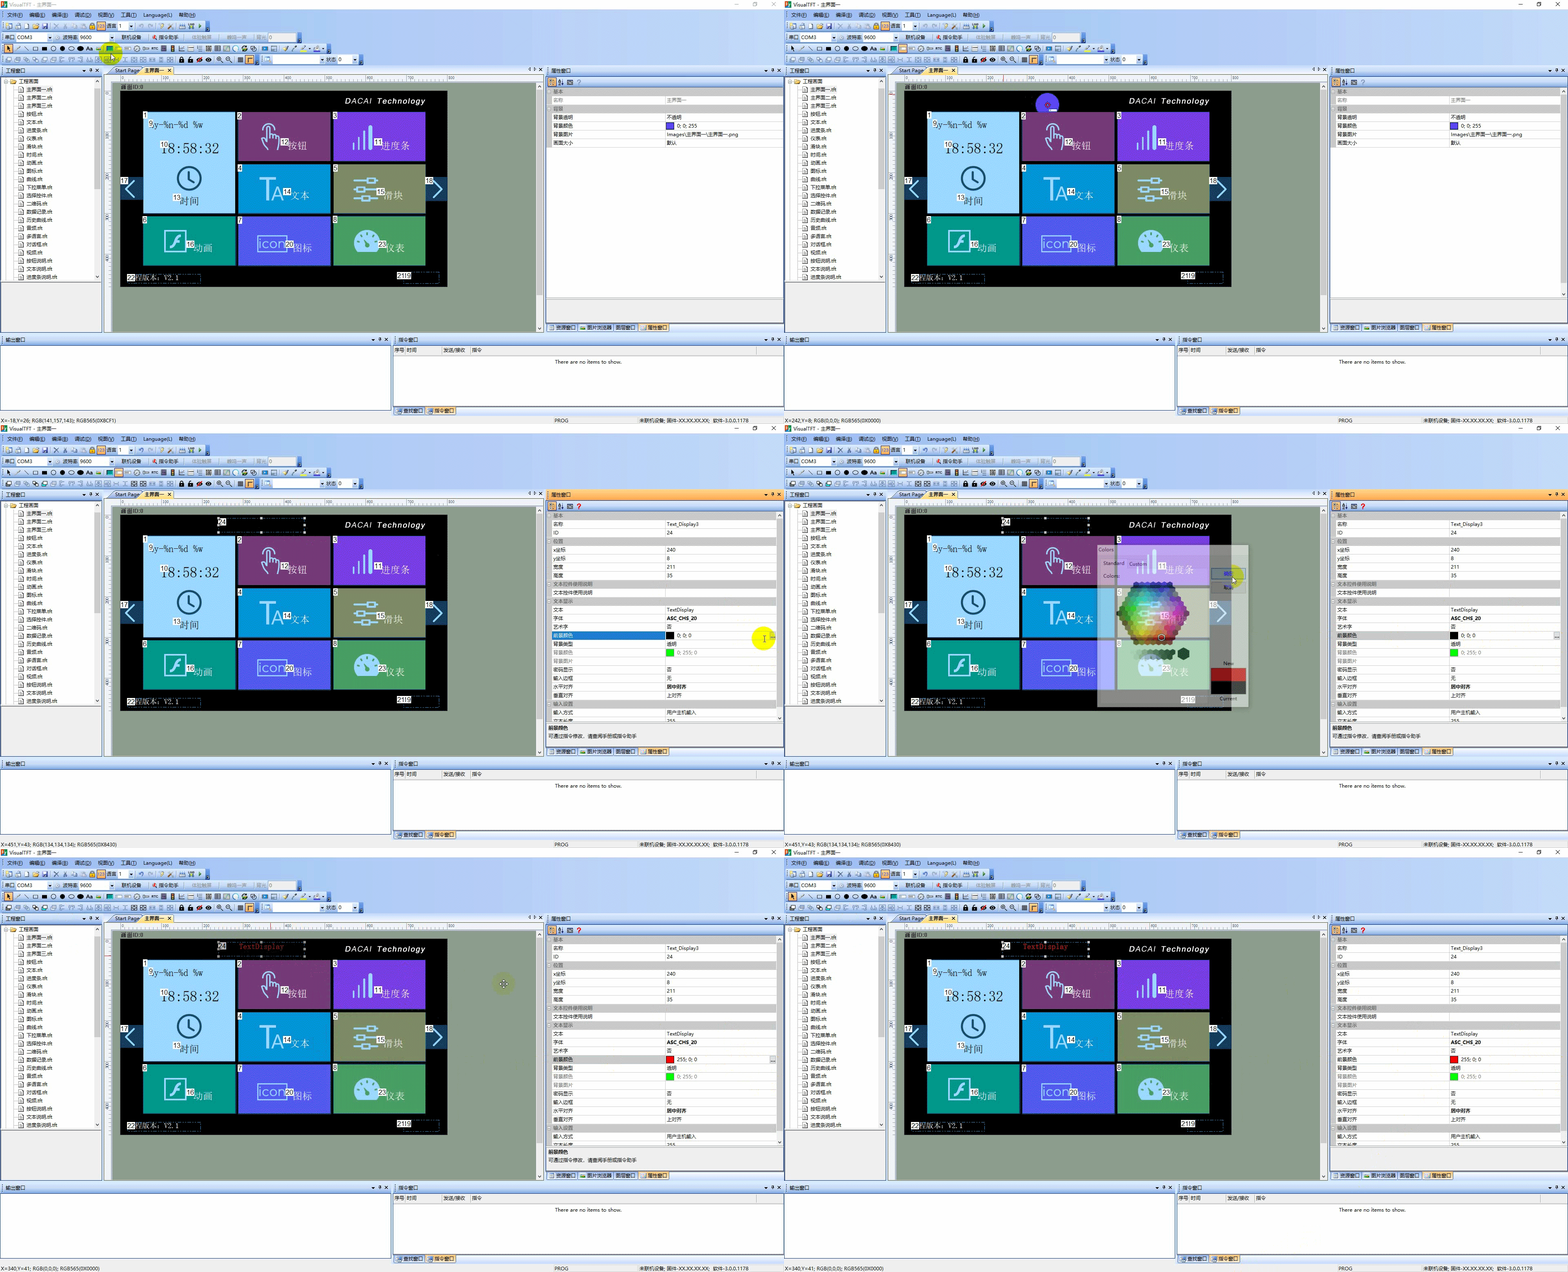
⑧ Property Window
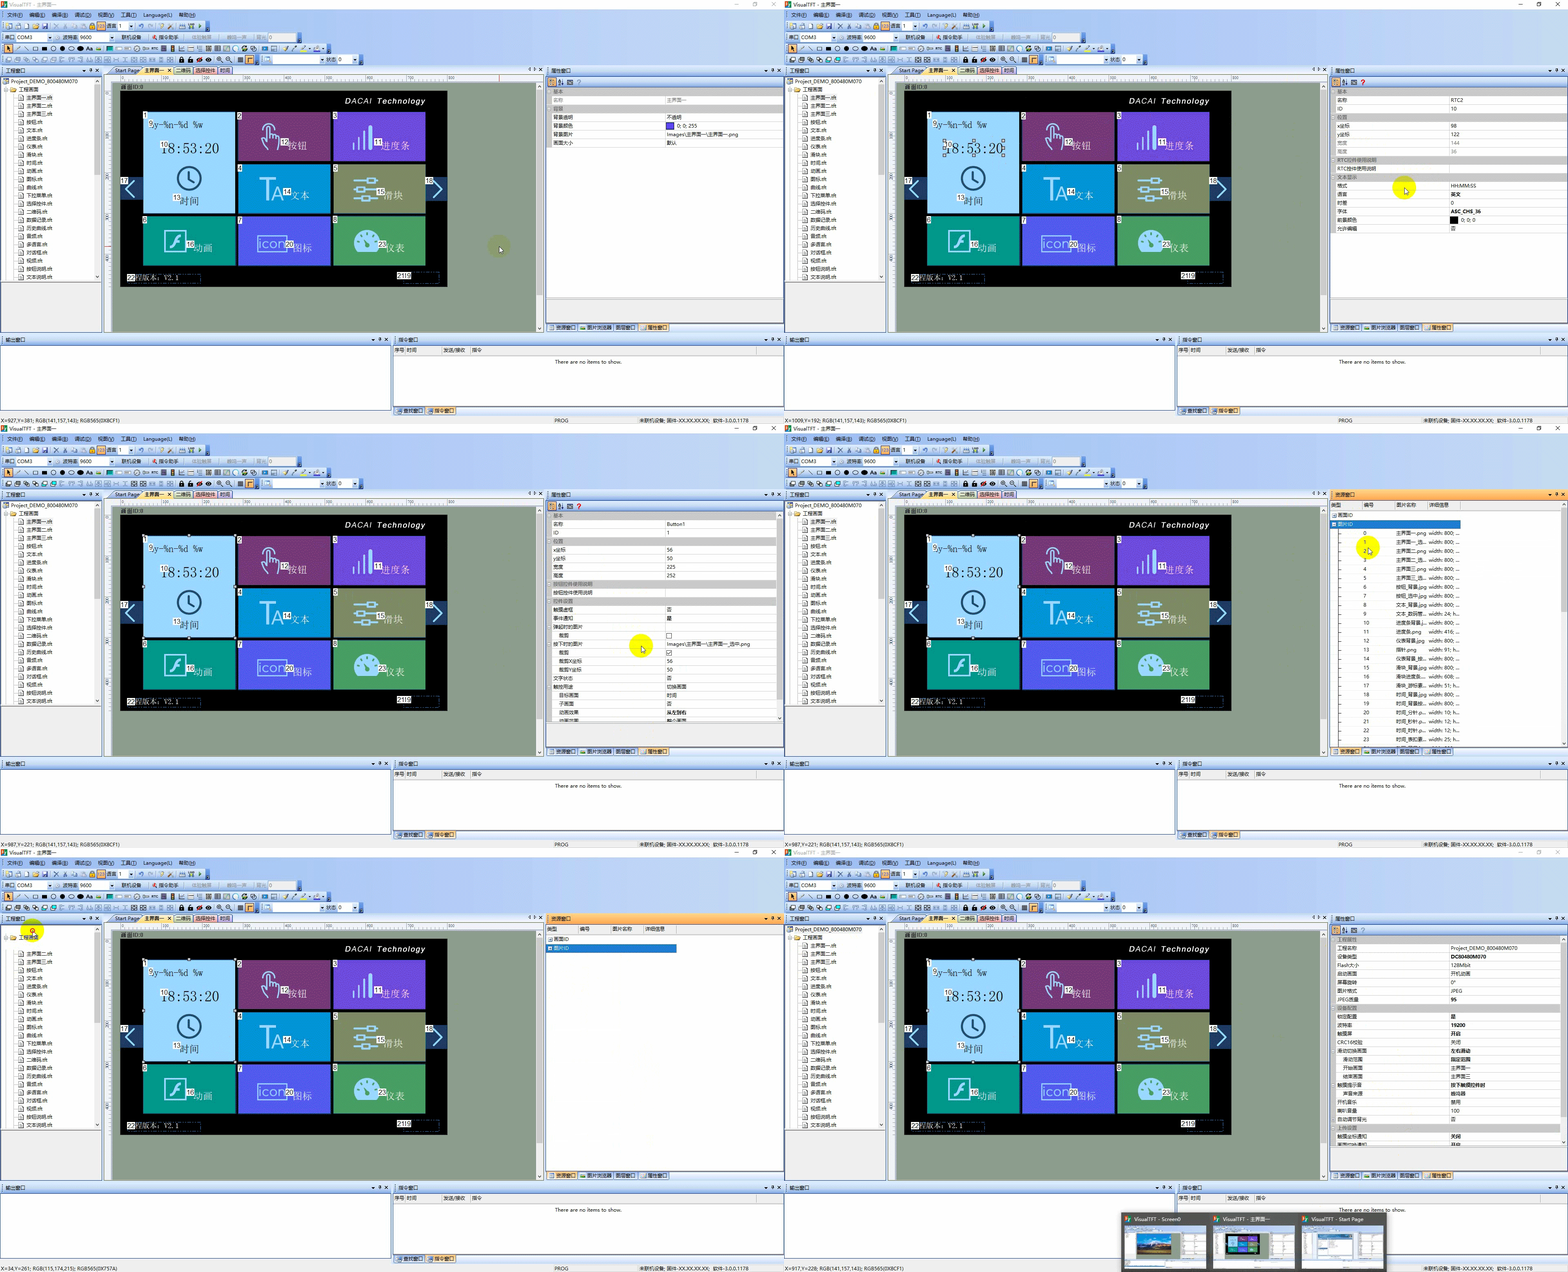
The right side belongs to the property window, which is mainly used to view the properties of the overall project configuration, the properties of the controls, and all the screens and pictures. As shown below
⑨ Output Window
When the user compiles, all errors, alarms, and total project size are output in this window
⑩ Command Window
After the user comes online successfully, he/she can view the specific message information in [Command Window] through command sending and receiving control, such as the VisualTFT online entity screen, and shake hands with the device in Instruction Helper
VisualTFT send: EE 04 FF FC FF FF
Screen feedback: EE 55 FF FC FF FF

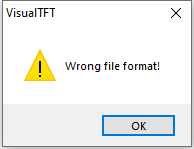
If the connection fails, the following prompt will appear: 
How to build a project
Click here to watch the video
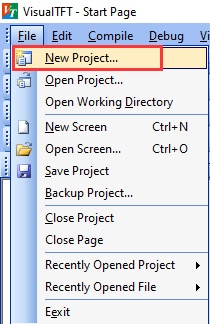
1. Click File ->New Project or click the shortcut key of New Project to create a new project

2. Name the project, choose the storage path, select M-series, and select the corresponding type according to the screen size
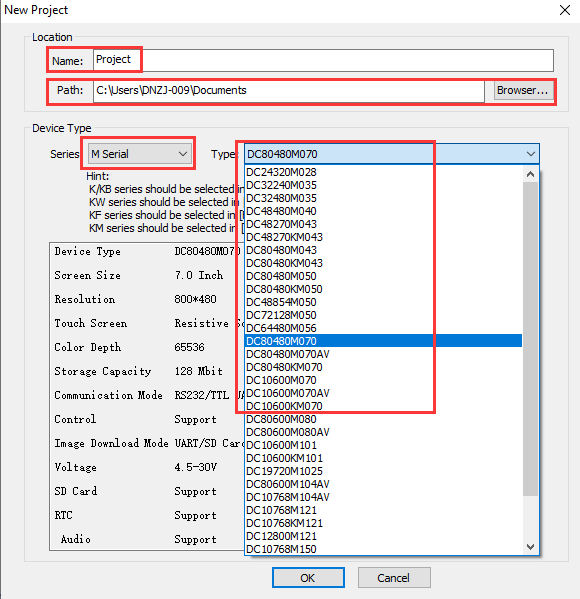
| Size | Type number |
|---|---|
| 2.4inch | DC240320M028 |
| 2.8inch | DC240320M028 |
| 3.5inch | DC32480M035 |
| 4.3inch | DC480272M043 |
| 5.0inch | DC800480M050 |
| 7.0inch | DC800480M070 |
FAQS
1. Using other serial port debugging assistant software can communicate with the screen, but clicking 'Open Device' in VisualTFT will cause connection failure.
A:Confirm whether the screen is RS232 level or TTL level, and check whether the hardware connection and settings are correct.
2.Set the language to English. Some windows of VisualTFT are still in Chinese.
A:This may be a software bug. Try switching languages several times. Click Compile. If you need to download, click Tools ->Product Wizard
3. Why can't I open he tft file of Project_DEMO?
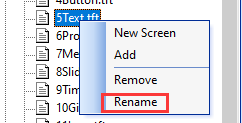
A: Click 'Files'->'Open Projects', and select .'tftprj file' to open project. If you need to rename .'tft file', please right click the file at Project window and click 'Rename' to modify the name. If you rename files in the hard disk folder, it will cause the failure to open files. Unless you re import the file that changed name.
Resources
VisualTFT_3.0.0.1215.zip
Project_demo_7inch.zip
Project_demo_5inch.zip
Project_demo_3.5inch.zip
Instruction_set_EN.pdf
