Current/Voltage/Power Monitor HAT for Raspberry Pi
Introduction
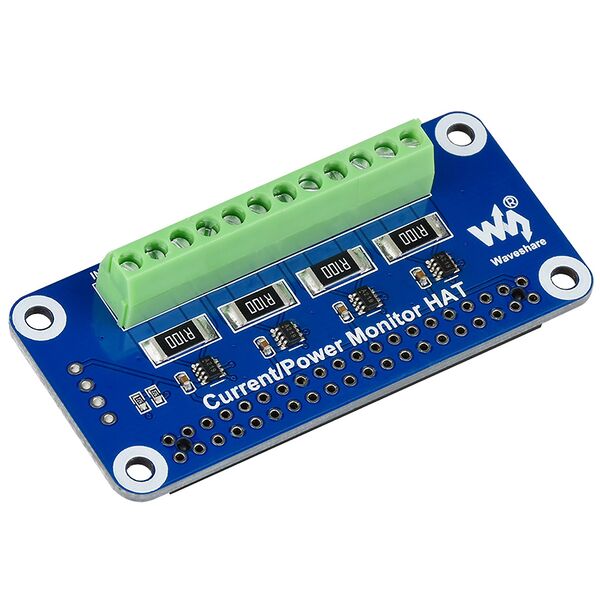
This is current and power monitor HAT designed for Raspberry Pi. Support 4-channel, it is easy to monitor current, voltage, and power consumption, voltage across the sampling resistor via the I2C or SMBus interface.
Model: RPA20901S
Features
- Standard Raspberry Pi 40PIN GPIO extension header, suitable for all Raspberry Pi boards
- Support 4-channel detection, can communicate through I2C/SMBus interface
- Onboard 0.1Ω 1% sampling resistor, allows measuring bi-directional current up to 3.2A
- Embedded 12-bit ADC, supports multiple successive converting, 0~26V voltage measuring range
- The output measurement power can be directly calculated through the additional multiplication register
- I2C control pins for connecting with other main boards easily
Specification
- Operating voltage: 3.3V/5V
- Control interface: I2C/SMBus
- Sampling resistor: 0.1Ω 1%
- Voltage range: 0~26V
- Current range: ±3.2A
- Resolution: 0.8mA (±3.2A range) OR 0.1mA (±400mA range)
- Dimensions: 65mm × 30mm
- Mounting hole size: 3.0mm
Interface Description
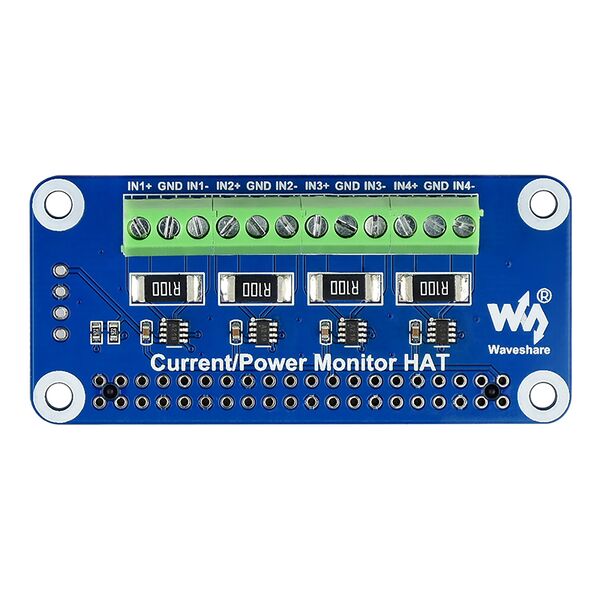
The module can measure the current and voltage of four channels, which correspond to (IN1+ IN1-), (IN2+ IN2-), (IN3+ IN3-) and (IN4+ IN4-) respectively. INx+ and INx- represent the input and output of the current respectively. The module obtains the magnitude of the current flowing by measuring the differential voltage of the sampling resistor connected in series with INx+ and INx-. The module can test bidirectional current, and all input and output connections can be reversed.
Note: In addition, it should be noted that measuring different power supplies needs to be connected to the GND common ground, otherwise the bus voltage cannot be measured, only the differential voltage and current can be measured.
Usage
Use with Raspberry Pi
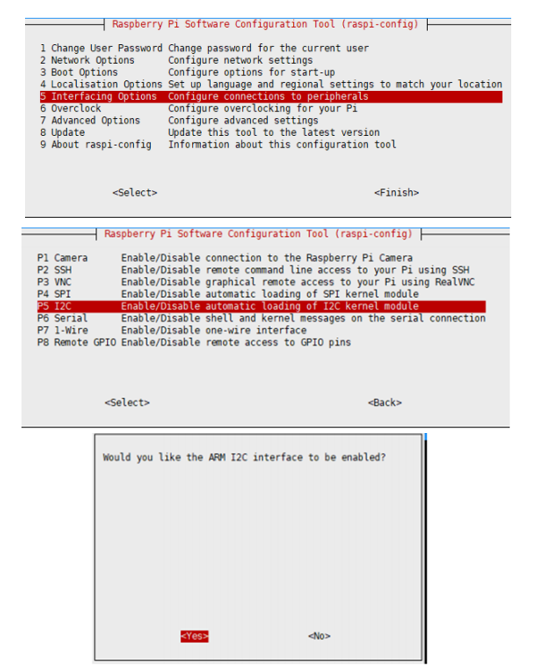
1. Open the I2C interface
1) Execute in the terminal:
Then restart the Raspberry Pi:
2. When using the Raspberry Pi to demonstrate this routine, you only need to insert the module into the Raspberry Pi header, or connect it to the Raspberry Pi’s I2C interface via a Dupont cable, connect VCC to 3.3V and enter the following command to run the program.
sudo pip3 install adafruit-circuitpython-ina219
sudo apt-get install p7zip
wget http://www.waveshare.net/w/upload/6/69/Current-Power_Monitor_HAT_Code.7z
7zr x Current-Power_Monitor_HAT_Code.7z -r -o./Current-Power_Monitor_HAT
cd Current-Power_Monitor_HAT/RaspberryPi
python3 ina219.py
After the program runs, the bus voltage, sampling resistor differential voltage, input voltage, power, current and other values will be output.


