RFM69 Shield
Introduction
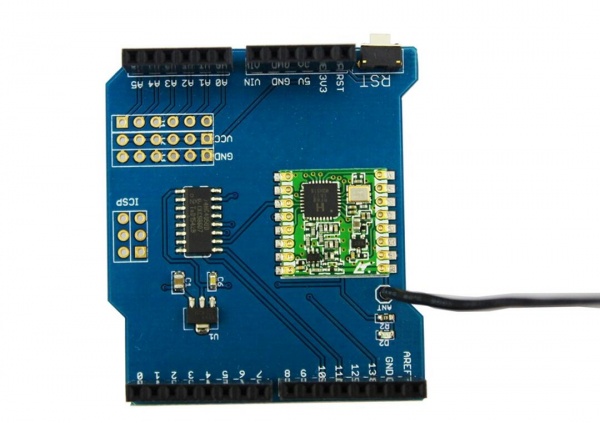
The RFM69 Shield- 434MHZ is an inexpensive and versatile radio module. You can use it to send text or binary data between two or hundreds of modules. It’s perfect for building inexpensive short-range wireless networks for home automation, citizen science, and more.
Model: ACS15238R

Features
- Frequency Range = Software configurable from ~240MHz to 980MHz
- Sensitivity = -118 dBm
- +17 dBm Max Output Power (Configurable)
- Data Rate = 1 to 128 kbps
- Digital RSSI
- Wake-on-radio
- Configurable packet structure
- Preamble detector
- TX and RX 64 byte FIFOs
- Low battery detector
- Temperature sensor and 8-bit ADC
- -40 to +85 °C temperature range
- Dimensions(mm):47.2(L)x53.5(W)x23.5(H)
Usage
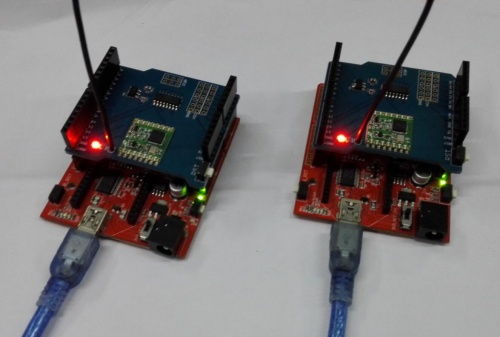
The RFM69 Sheild is very easy to use. You need at least two of the shield and two Crowduino board. This program is used two this shield.
1. Plug the RFM69 shield into the Crowduino and connect the shield to the computer by USB cable.
2. Download the RFM69.zip Library. Unzip and put it in the libraries file of Arduino IDE by the path: ..\arduino-1.0.x\libraries;
3. Before you upload the code to your Arduino, you’ll need to customize it for each node. Use the code below, and make the following changes for each separate node.
Node 1
Let's set it up for your FIRST node:
1.Near the top of the code, look for #define NETWORKID, and change the value to 0. This will be the network all your nodes are part of, so it should be the same for all your nodes. (You can of course make this any number from 0 to 255, as long as it's the same for all your nodes.)
2.Now look for the #define MYNODEID line, and change the value to 1. That will be this node's address.
3.Look for the #define TONODEID line, and change the value to 2. That will be the other node's address; the one you'll be talking to.
4.Below these lines will be a section for defining the radio frequency of your RFM69HCW board. Uncomment the line corresponding to your board's frequency, and make sure the others are commented (have // in front of them. If you forget it, the frequency is marked on the bottom of your RFM69HCW board).
5.If you want to use encryption, change the #define ENCRYPT value to true, and put a 16-character string of your choice into the ENCRYPTKEY value. This key must be the same for all <>nodes on your network. Keep it a secret!
6.Finally, if you wish to use acknowledgements, set USEACK to true. If not, set it to false. Use the same setting for all your nodes.
7.Now upload the sketch to your FIRST node. Remember that you should set the “Tools/Port” menu to the COM port you wrote down earlier for the FIRST node, and if you're using a 3.3V Arduino Pro as we recommend, you should set the “Tools/Board” menu to “Arduino Pro or Pro Mini” and “Tools/Processor” to “ATmega328 (3.3V, 8MHz)”
Node 2
Time to modify the sketch for the SECOND node.
Go back up to the #define MYNODEID line, and change the number to 2. That will be this node’s address.
Now look for the #define TONODEID line, and change the number to 1. That will be the other node’s address; the one you’ll be talking to.
See how we swapped the MYNODEID and TONODEID numbers? This way each node will send messages to the other one.
Upload the sketch to your SECOND node. Change the “Tools/Port” menu to the second COM Port you wrote down from above, and upload. That’s it, we’re done!
Load and Modify the Code
Copy the code from the below window into the Arduino IDE (be sure the editing window is completely blank first). After you’ve installed the RFM69 library, you can also find this code in the Arduino IDE under “File / Examples / RFM69 / SFE_RFM69HCW_example.ino”. Don’t forget to make the changes mentioned above.
Copy the code from the below window into the Arduino IDE (be sure the editing window is completely blank first). After you’ve installed the RFM69 library, you can also find this code in the Arduino IDE under “File / Examples / RFM69 / SFE_RFM69HCW_example.ino”. Don’t forget to make the changes mentioned above.
Running the Sketches
You now have two nodes that will send messages to each other, but, to use them, we’ll need to open two serial terminals.
One way to do this is to run two separate Arduino IDEs. You’ll have to actually start Arduino twice - you can’t just open a “new” code window from the first IDE.
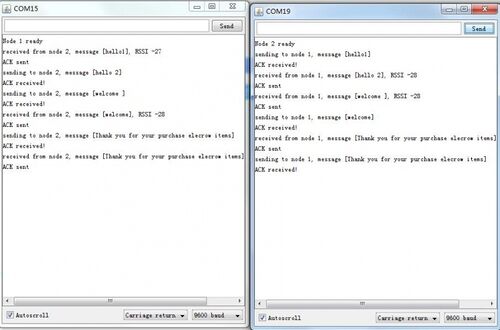
Set one IDE to the COM port of the first node and the other to the COM port of the second. Then, open serial monitor windows from both IDEs.
In each serial monitor window, you’ll need to set the baud rate to 9600 and make sure the “line ending” dropdown is set to “carriage return.” (The example code uses carriage returns as a signal to send a packet.)
Once both windows are up, you should be able to type messages in the text entry box at the top of one window and press return to send the message to the other window. Try it!

