8 inch Touchscreen IPS Display 1280x800 Small Portable Monitor Compatible with Raspberry Pi 540043 Win 111087 Jetson Nano
Description
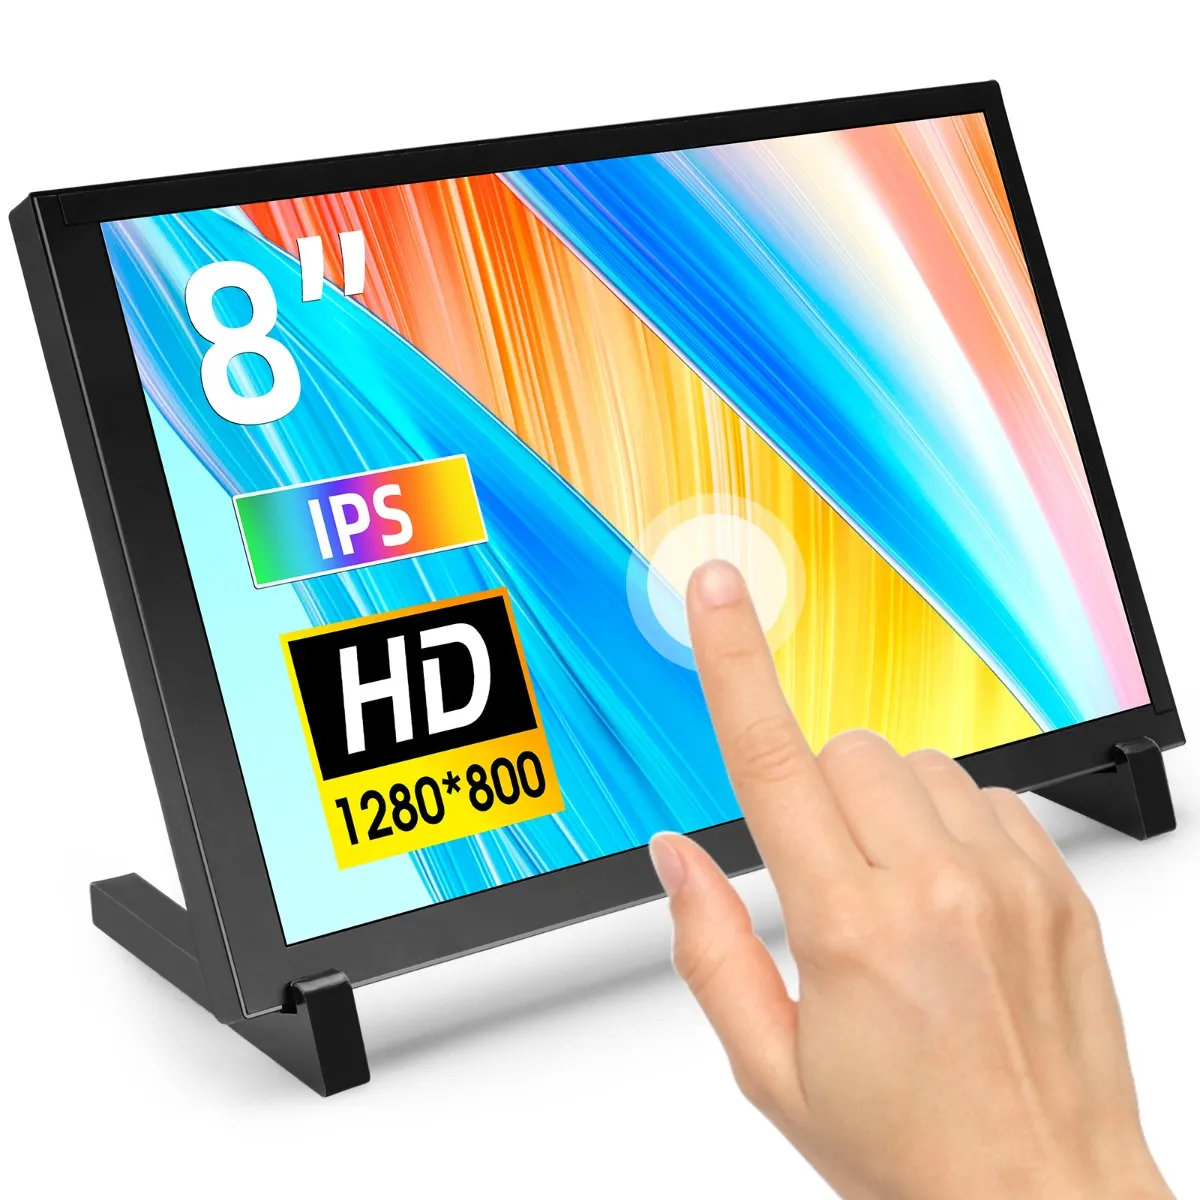
This 8-inch HD touch monitor is equipped with an IPS screen and supports a high-definition resolution of 1280*800, which can provide clear visual effects. The capacitive touch screen supports up to 5-point touch to ensure smooth operation. It is widely used and compatible with various devices, including Raspberry Pi ¾/5, Jetson Nano, laptops, game consoles and other HD devices. It supports multiple system displays and supports Raspbian, Kali linux, Ubuntu, Kodi, Win10 IOT, Win⅞/10/11 and other systems and it is driver-free for touch. The screen has two USB ports, one of which can provide additional power to the device to ensure stable operation. The bracket and back mounting hole design support multiple installation methods, and you can easily install a small SBC or mount it on the wall. Whether it is work, entertainment or DIY projects, this monitor is your ideal choice!
For customized requirements (based on MOQ), please contact us at service@elecrow.com.
Model DIS85801D
Features
- 8-inch IPS display with 1280*800 resolution, bringing a clear and delicate visual experience;
- High-sensitivity capacitive touch screen, supports up to 5-point touch, ensuring the accuracy and smoothness of operation;
- Compatible with various devices, such as Raspberry Pi, Jetson Nano and other development boards, PS4, XBOX, and other game consoles
- Support Raspbian, Kali Linux, Ubuntu, Kodi and other operating systems, realizing touch driver-free, plug and play
- With stand and mounting holes, can easily install the small SBC and install on the wall.
Specification
| Size | 8 inch |
|---|---|
| Panel Type | IPS Panel |
| Touch Type | Capacitive Touch |
| Resolution | 1280 x 800 |
| Brightness (typical) | 220 cd/m2 |
| Backlight adjustment | Key switch adjustment |
| Power | MicroUSB(5V) |
| Module overall power | 3.79W (100% brightness) |
| Video Input Interface | HD (up to 1080p) |
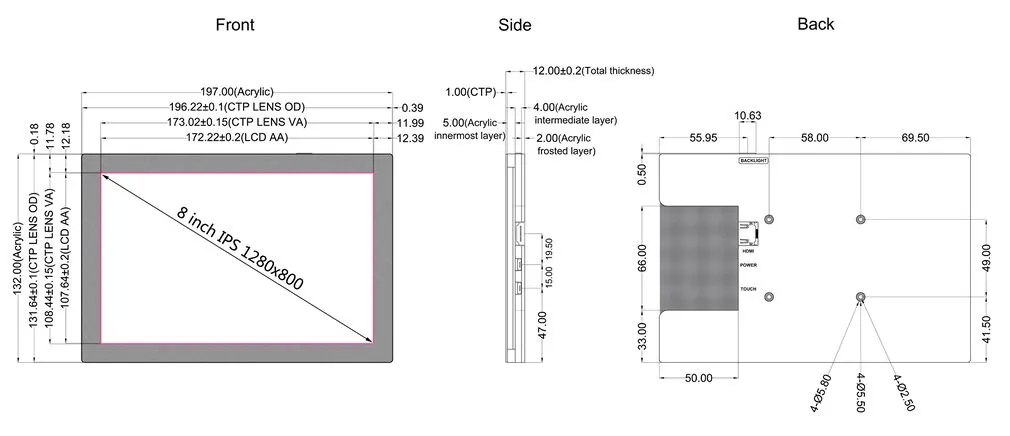
| Active Area | 172.22*107.64(mm) |
| Module Size (L x W x H) | 197.0*132.0*12.0±0.2 (mm) |
| Packaging Size (L x W x H) | 234.0*164.0*62.0 (mm) |
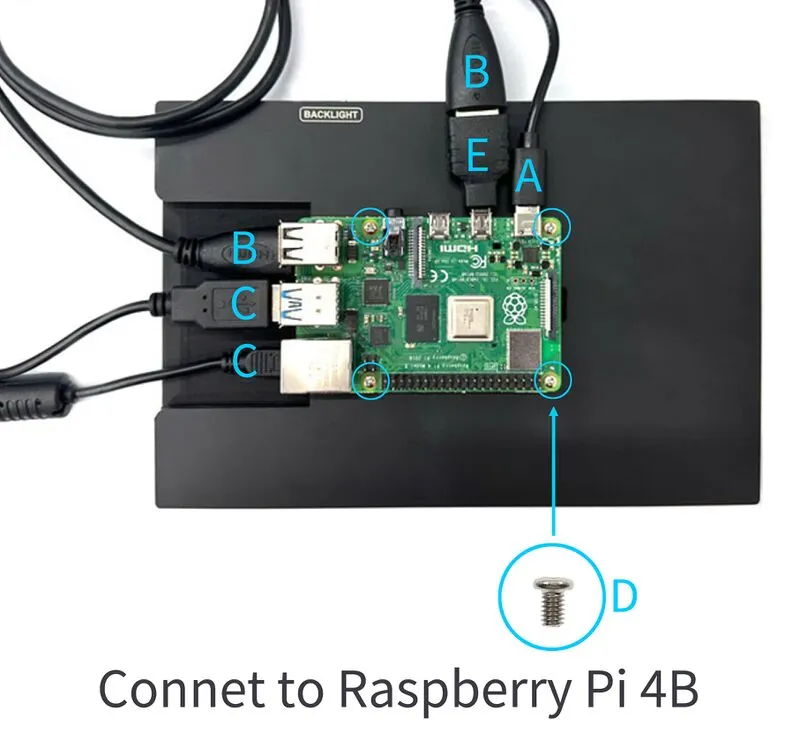
Key and Interface Function Description:

| KEY and Interface | DESCRIPTION |
|---|---|
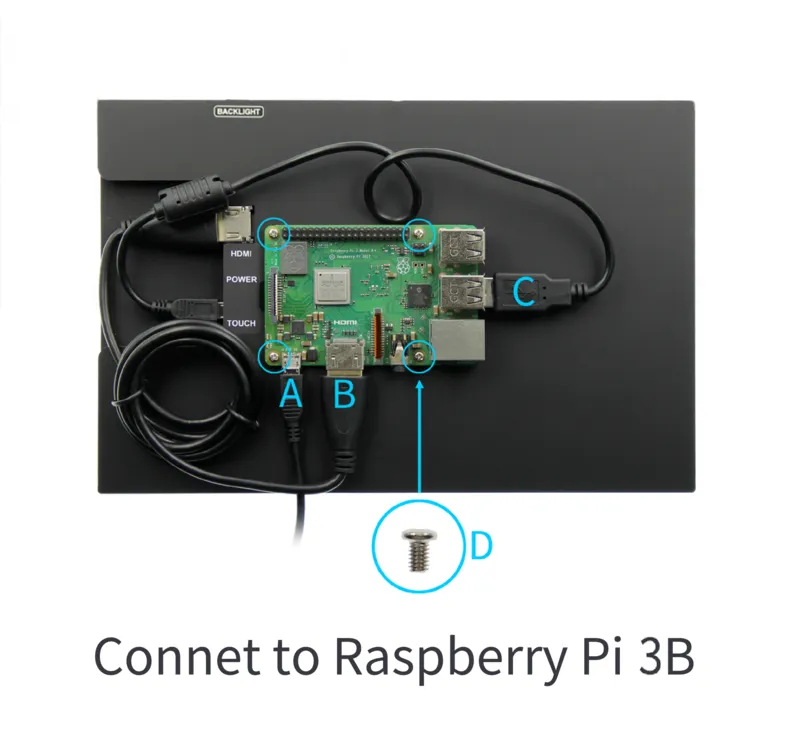
| A: Touch touch interface | Micro USB cable is used to connect with the signal source device. This interface is used for touch and power supply |
| B: Power interface | Using micro USB cable and power connection, this interface is only used for power supply |
| C: HDMI interface | Use HDMI cable to connect with signal source equipment, and the maximum supported resolution is 1080p |
| D: Side key | It is used to adjust the brightness. Press once to increase the brightness by 10%. After reaching 100%, press once again to return to 10%;Press and hold for 3 seconds to turn off the backlight, and then press again to restore the original brightness |
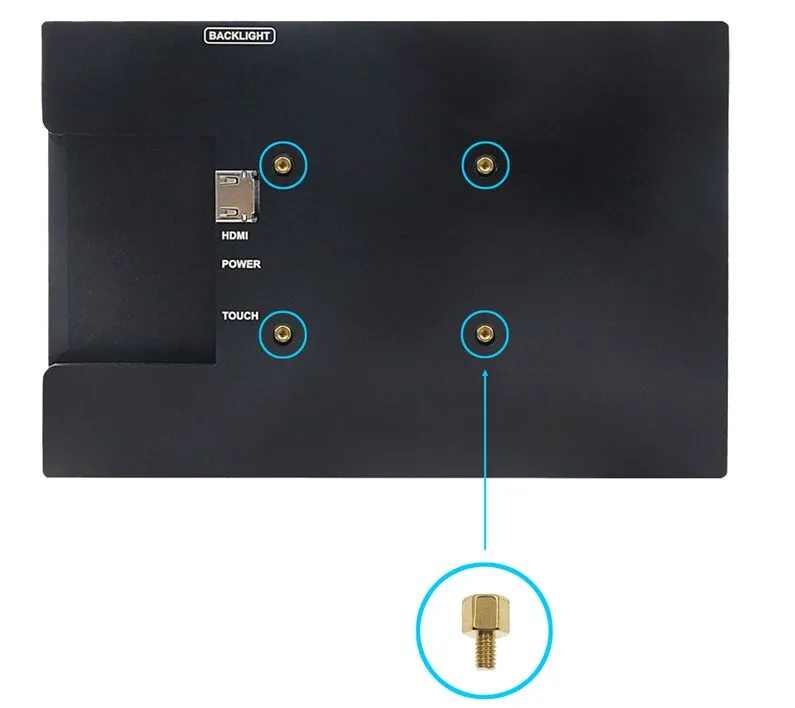
| E: Copper pillar | Used to fix raspberry pie (M2.5) |
Product Size
Connect to Raspberry Pi
Working with Raspberry Pi
Step 1. Download the Official image
- Download Raspbian Official Image
Download URL: https://www.raspberrypi.org/downloads/raspbian/
Username: pi Password: raspberry - Download Ubuntu Mate Official Image
Download URL: https://ubuntu-mate.org/download/
The user name and password can be set by yourself after startup - Download Kail Official Image
Download URL: https://www.offensive-security.com/kali-linux-arm-images/
Username: kali (The old version is root) Password: kali(The old version is toor) - Download Retropie Official Image
Download URL: https://retropie.org.uk/download/
Username: pi Password: raspberry
Step 2. Brun Official Image
- Download and install tool software (If they are already installed,this step can be ignored)
SD card format software SDCard Formatter download URL :
https://www.sdcard.org/downloads/formatter_4/
Image burning software win32diskimager download URL:
https://sourceforge.net/projects/win32diskimager/ - Format SD card
Insert the SD card into the card reader -> Insert the card reader into the computer -> Open the SDFormatter software -> Select SD card -> Select quick format (generally select quick format, other options can be selected according to your own needs) -> Click the Format button -> Select "Yes" -> Click OK after formatting. - Brun Image
Open the win32diskimager software -> Select the image file to be burned (xxx.img ) -> Select SD card -> Click the "write" button -> Select "Yes" -> Wait for the burning to complete (the whole process lasts about 10 minutes)
Step 3. Modify the “config.txt” configuration file
Open the “config.txt” file in the root directory of SD card on the computer, Add the following at the end of the file, save and exit.
max_usb_current=1
hdmi_force_hotplug=1
config_hdmi_boost=7
hdmi_group=2
hdmi_mode=87
hdmi_drive=1
display_rotate=0
hdmi_cvt 1280 800 60 6 0 0 0
Step 4. Insert SD card
After the above steps are completed, pop up the SD card on the computer and insert it into the SD card slot on the back of the raspberry pie.
Step 5. Running system
Connect the HDMI interface and touch interface of the display screen to raspberry pie, connect the power supply of raspberry pie,and start the machine to display and touch normally.
Work as HDMI touch monitor
This product can be used as the HDMI touch monitor of Windows computer, only need to connect HDMI interface and TOUCH interface, can normally display and support up to five points touch.
Resources
Document:
- How_to_install_the_LCD_driver_V1.2
- How_to_install_matchbox-keyboard
- How_to_use_Raspberry_Pi(Download,Format,Burn,SSH,PuTTy)-V1.0.pdf
Driver download:
- Local download: LCD-show.tar.gz
Images Download:
If you have difficulty installing the driver, or if you still can't use the display properly after installing the driver,Please Try our Configned images for tested.
Just need download and write the image into the TF card. DO NOT need any driver installation steps.
Software
How to buy
Please visit this page to purchase Elecrow nRFLR1110 Wireless Transceiver Module.
Support
If you have any problem about how to use it, you can connect to us at the bottom-right of bazzer or contact to techsupport@elecrow.com to get technology support.