Speech Interaction board for Raspberry Pi
Introduction
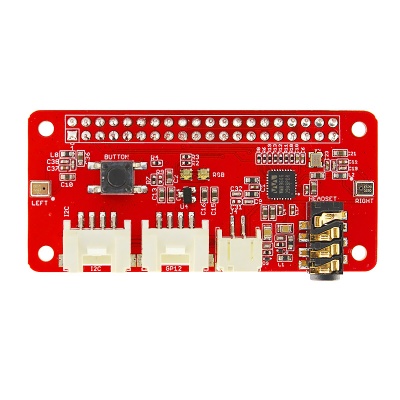
Speech Interaction board for Raspberry Pi is a dual-microphone expansion board for Raspberry Pi designed for AI and voice applications. This means that you can build a more powerful and flexible voice product that integrates Amazon Alexa Voice Service, Google Assistant, and so on. There are 2 microphones on both sides of the board for collecting sounds and it also provides 2 APA102 RGB LEDs, 1 User Button and 2 on-board crowtail interfaces for expanding your applications. What is more, 3.5mm Audio Jack or JST 2.0 Speaker Out are both available for audio output.
Model:
Features
-
Raspberry Pi compatible(Support Raspberry Pi Zero and Zero W, Raspberry Pi B+, Raspberry Pi 2 B and Raspberry Pi 3 B)
-
2 Microphones
-
2 Crowtail Interfaces
-
1 User Button
-
3.5mm Audio Jack
-
JST2.0 Speaker Out
Specifications
-
BUTTON: a User Button, connected to GPIO17
-
MIC_Land MIC_R: 2 Microphones on both sides of the board
-
RGB LED: 2 APA102 RGB LEDs, connected to SPI interface
-
WM8960: a low power stereo codec
-
Raspberry Pi 40-Pin Headers: support Raspberry Pi Zero, Raspberry Pi 1 B+, Raspberry Pi 2 B and Raspberry Pi 3 B
-
I2C: crowtail I2C port, connected to I2C-1
-
GPIO12: Crowtail digital port, connected to GPIO12 & GPIO13
-
JST 2.0 SPEAKER OUT: for connecting speaker with JST 2.0 connector
-
3.5mm AUDIO JACK: for connecting headphone or speaker with 3.5mm Audio Plug
Application
-
Voice Interaction Application
-
AI Assistant
User
System configuration and driver installation
Step 1. Insert the Speech Interaction Board for Raspberry Pi
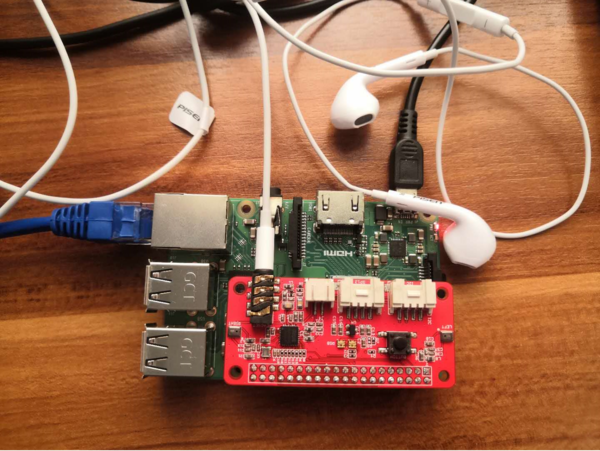
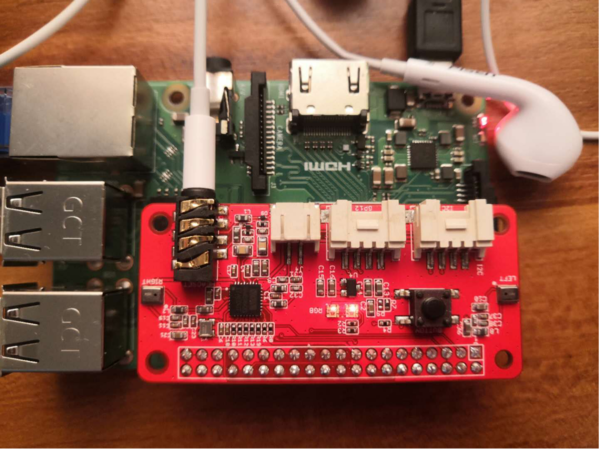
1)Insert the Speech Interaction Board for Raspberry Pi into the Raspberry Pi, making sure the pins are aligned when you insert the Raspberry Pi.
Step 2. Burn system, login, change source
Since the current Pi kernel does not currently support the WM8960 codec, we need to build it manually.
1)Make sure you are running the latest Raspbian operating system (debian 9) on your Pi, you can use etcher for system burning. 2)You can connect Raspberry Pi with VNC or PUTTY, but please configure wifi before. 3)Before installing the driver, please switch the source to Tsinghua according to the following procedure.
If you commented out the original file content with #, replace it with the following:
deb http://mirrors.tuna.tsinghua.edu.cn/raspbian/raspbian/ buster main non-free contrib
deb-src http://mirrors.tuna.tsinghua.edu.cn/raspbian/raspbian/ buster main non- free contrib
Step 3. Download and install the driver Run the following command
sudo apt-get update
sudo apt-get upgrade
git clone https://github.com/respeaker/seeed-voicecard.git
cd seeed-voicecard      #Download the sound card driver
sudo ./install.sh         #Install the sound card driver
reboot                #Restart
Step 4. Check if the sound card name
pi @ raspberrypi: ~ / seeed-voicecard $ aplay -l
**** List of PLAYBACK Hardware Devices ****
card 0: ALSA [bcm2835 ALSA], device 0: bcm2835 ALSA [bcm2835 ALSA]
  Subdevices: 8/8
  Subdevice # 0: subdevice # 0
  Subdevice # 1: subdevice # 1
  Subdevice # 2: subdevice # 2
  Subdevice # 3: subdevice # 3
  Subdevice # 4: subdevice # 4
  Subdevice # 5: subdevice # 5
  Subdevice # 6: subdevice # 6
  Subdevice # 7: subdevice # 7
card 0: ALSA [bcm2835 ALSA], device 1: bcm2835 ALSA [bcm2835 IEC958 / HDMI]
  Subdevices: 1/1
  Subdevice # 0: subdevice # 0
card 1: seeed2micvoicec [seeed-2mic-voicecard], device 0: bcm2835-i2s-wm8960-hifi wm8960-hifi-0 []
  Subdevices: 1/1
  Subdevice # 0: subdevice # 0

pi @ raspberrypi: ~ / seeed-voicecard $ arecord -l
**** List of CAPTURE Hardware Devices ****
card 1: seeed2micvoicec [seeed-2mic-voicecard], device 0: bcm2835-i2s-wm8960-hifi wm8960-hifi-0 []
  Subdevices: 1/1
  Subdevice # 0: subdevice # 0
pi @ raspberrypi: ~ / seeed-voicecard $
Recording playback
Recording test You can use arecord recording and then aplayplay. (don't forget to plug in headphones or speakers).
The control example APA102 LED
Each onboard APA102 LED has an additional driver chip that sets the color of the LED and then maintains that color until a new command is received.
Please enable SPI before executing, the specific steps are as follows:
-Enter: `sudo raspi-config`;
-Select "Interfacing Options";
-Select "SPI";
-Select "Yes"
-Select "OK"
-Select "Finish"
After configuration, you can execute the following command line to run the led example
cd ~ /
git clone https://github.com/respeaker/mic_hat.git
sudo pip install spidev                   #Install the spi driver
cd mic_hat
python pixels.py
use user-defined button
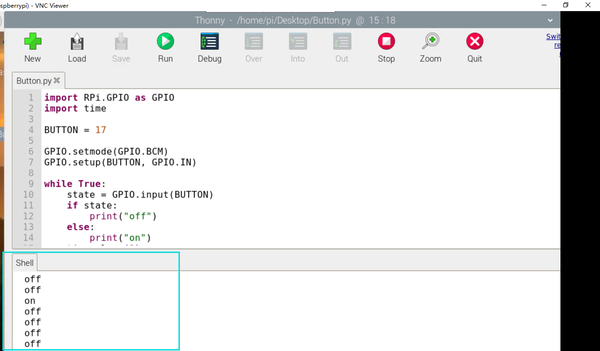
There is a user-defined button on the board, which is connected to GPIO17. We can call python and RPi.GPIO to read the status.
sudo pip install rpi.gpio          // install RPi.GPIO library
nano button.py                // copy the following code in button.py
import  RPi.GPIO  as  GPIO
import  time

BUTTON  =  17

GPIO . Setmode ( GPIO . BCM )
GPIO . Setup ( BUTTON ,  GPIO . IN )

while  True :
    state  =  GPIO . input ( BUTTON )
    if  state :
        print ( "off" )
    else :
        print ( "on" )
    time . sleep ( 1 )
Save the code as button.py, then run it. It should display "on" when you press the button:
What Raspberry Pi's interface had been occupyed by this board:
I2C_SDA , I2C_SCL, I2S_CLK, I2S_LRCLK, I2S_ADC, I2S_DAC, GPIO17 , GPIO12, GPIO13, SPI_MOSI, SPI_SCLK,


