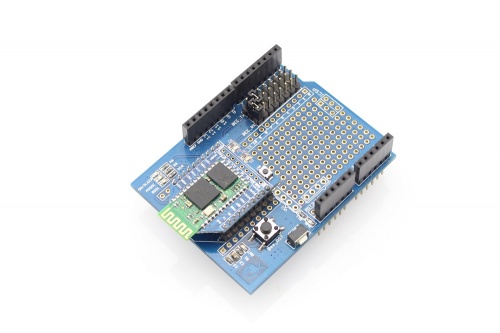
XBee shield
Description
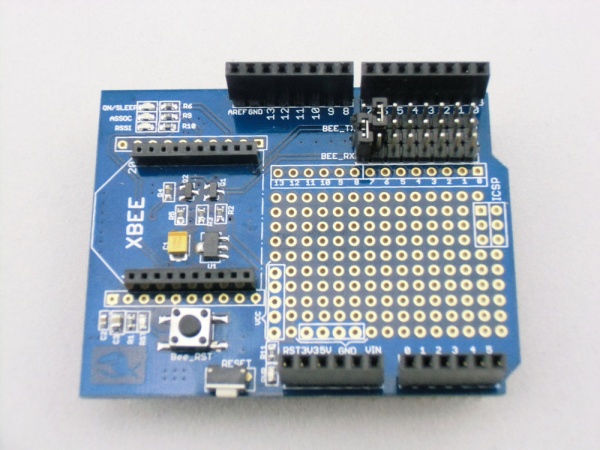
XBee shield will make interfacing multiple Bee-style (XBee, GPS Bee, Bluetooth Bee and etc) easier than ever before.it has large proto area, customizable software serial port for easier prototyping.
Model: (Discontinued)
Features
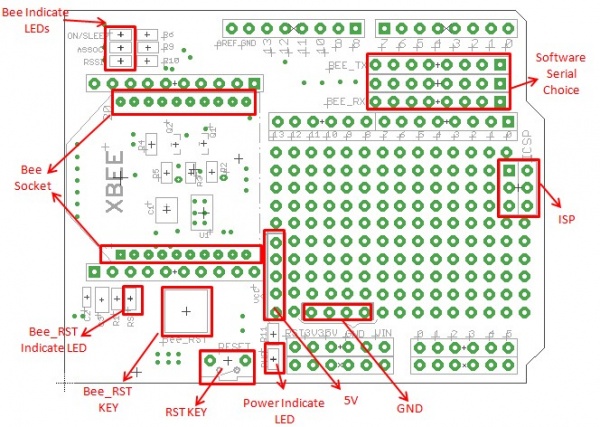
- 3 indicator LED(ON/Sleep, RSSI, ASSOC)for XBee
- Full size with free drills
- Reset button for XBee and base board
- Provide maximal 500mA under 3.3V
- Full break out for XBee
- Full break out for the base board
- Standard Shield footprint
- Dimensions(mm):69.0(L)x54.5(W)x23.5(H)
Cautions
The warnings and wrong operations possible cause dangerous.
Interface function
Usage
1.Hardware connection
Plug the Xbee into the XBee shield,then plug the XBee shield into Arduino/Crowduino.
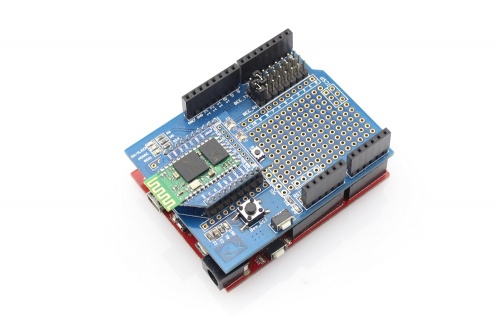
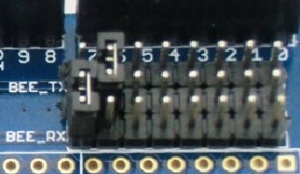
2.Two jumpers are required to connect Bee_TX, Bee_RX with Digital by using Bee like this:
Bee_TX, Bee_RX can be connected to PD0PD7(PD2PD7 is used as soft serial and PD0,PD1 is used as hardware serial.).
This demo will show you how to communicate between two Arduino/Crowduino through Bluetooth Shield.For the special applications, you may need to write the code by yourself.
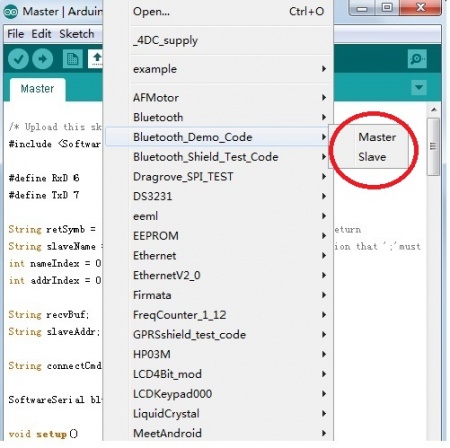
3.Download the Arduino Library for the shield, and unzip it into the path of Arduino Libraries. This library includes two sketch, one for Master and the other for Slave. Make sure Software Serial Library is included as well.
4.Upload the sketch Master.ino and Slave.ino to two separate Arduino/Crowduino.
4.1 Master
/* Upload this sketch into Arduio and press reset*/
#include <SoftwareSerial.h>   //Software Serial Port

#define RxD 6
#define TxD 7

String retSymb = "+RTINQ=";//start symble when there's any return
String slaveName = ";CrowBTSlave";//Set the Slave name ,caution that ';'must be included
int nameIndex = 0;
int addrIndex = 0;

String recvBuf;
String slaveAddr;

String connectCmd = "\r\n+CONN=";

SoftwareSerial blueToothSerial(RxD,TxD);

void setup()
{
  Serial.begin(38400);
  pinMode(RxD, INPUT);
  pinMode(TxD, OUTPUT);
  setupBlueToothConnection();
  //wait 1s and flush the serial buffer
  delay(1000);
  Serial.flush();
  blueToothSerial.flush();
}

void loop()
{
  char recvChar;
  while(1){
    if(blueToothSerial.available()){//check if there's any data sent from the remote bluetooth shield
      recvChar = blueToothSerial.read();
      Serial.print(recvChar);
    }
    if(Serial.available()){//check if there's any data sent from the local serial terminal, you can add the other applications here
      recvChar  = Serial.read();
      blueToothSerial.print(recvChar);
    }
 }
}

void setupBlueToothConnection()
{
  blueToothSerial.begin(38400); //Set BluetoothBee BaudRate to default baud rate 38400
  blueToothSerial.print("\r\n+STWMOD=1\r\n");//set the bluetooth work in master mode
  blueToothSerial.print("\r\n+STNA=CrowBTMaster\r\n");//set the bluetooth name as "CrowBTMaster"
  blueToothSerial.print("\r\n+STPIN=0000\r\n");//Set Master pincode"0000",it must be same as Slave pincode
  blueToothSerial.print("\r\n+STAUTO=0\r\n");// Auto-connection is forbidden here
  delay(2000); // This delay is required.
  blueToothSerial.flush();
  blueToothSerial.print("\r\n+INQ=1\r\n");//make the master inquire
  Serial.println("Master is inquiring!");
  delay(2000); // This delay is required.

  //find the target slave
  char recvChar;
  while(1){
    if(blueToothSerial.available()){
      recvChar = blueToothSerial.read();
      recvBuf += recvChar;
      nameIndex = recvBuf.indexOf(slaveName);//get the position of slave name
      //nameIndex -= 1;//decrease the ';' in front of the slave name, to get the position of the end of the slave address
      if ( nameIndex != -1 ){
        //Serial.print(recvBuf);
    addrIndex = (recvBuf.indexOf(retSymb,(nameIndex - retSymb.length()- 18) ) + retSymb.length());//get the start position of slave address
    slaveAddr = recvBuf.substring(addrIndex, nameIndex);//get the string of slave address
    break;
      }
    }
  }
  //form the full connection command
  connectCmd += slaveAddr;
  connectCmd += "\r\n";
  int connectOK = 0;
  Serial.print("Connecting to slave:");
  Serial.print(slaveAddr);
  Serial.println(slaveName);
  //connecting the slave till they are connected
  do{
    blueToothSerial.print(connectCmd);//send connection command
    recvBuf = "";
    while(1){
      if(blueToothSerial.available()){
        recvChar = blueToothSerial.read();
    recvBuf += recvChar;
    if(recvBuf.indexOf("CONNECT:OK") != -1){
          connectOK = 1;
      Serial.println("Connected!");
      blueToothSerial.print("Connected!");
      break;
    }else if(recvBuf.indexOf("CONNECT:FAIL") != -1){
      Serial.println("Connect again!");
      break;
    }
      }
    }
  }while(0 == connectOK);
}
4.2 Slave
#include <SoftwareSerial.h>   //Software Serial Port
#define RxD 6
#define TxD 7

SoftwareSerial blueToothSerial(RxD,TxD);

void setup()
{
  Serial.begin(38400);
  pinMode(RxD, INPUT);
  pinMode(TxD, OUTPUT);
  setupBlueToothConnection();
}

void loop()
{
  char recvChar;
  while(1){
    if(blueToothSerial.available()){//check if there's any data sent from the remote bluetooth shield
      recvChar = blueToothSerial.read();
      Serial.print(recvChar);
    }
    if(Serial.available()){//check if there's any data sent from the local serial terminal, you can add the other applications here
      recvChar  = Serial.read();
      blueToothSerial.print(recvChar);
    }
  }
}

void setupBlueToothConnection()
{
  blueToothSerial.begin(38400); //Set BluetoothBee BaudRate to default baud rate 38400
  blueToothSerial.print("\r\n+STWMOD=0\r\n"); //set the bluetooth work in slave mode
  blueToothSerial.print("\r\n+STNA=CrowBTSlave\r\n"); //set the bluetooth name as "CrowBTSlave"
  blueToothSerial.print("\r\n+STPIN=0000\r\n");//Set SLAVE pincode"0000"
  blueToothSerial.print("\r\n+STOAUT=1\r\n"); // Permit Paired device to connect me
  blueToothSerial.print("\r\n+STAUTO=0\r\n"); // Auto-connection should be forbidden here
  delay(2000); // This delay is required.
  blueToothSerial.print("\r\n+INQ=1\r\n"); //make the slave bluetooth inquirable
  Serial.println("The slave bluetooth is inquirable!");
  delay(2000); // This delay is required.
  blueToothSerial.flush();
}
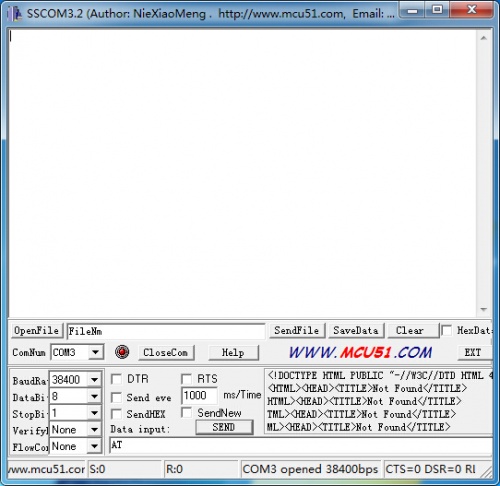
5.Open two Serial Terminals on your PC, with the setting of 38400, 8, 1, N. Open the two Com Port of Arduino/Crowduino.
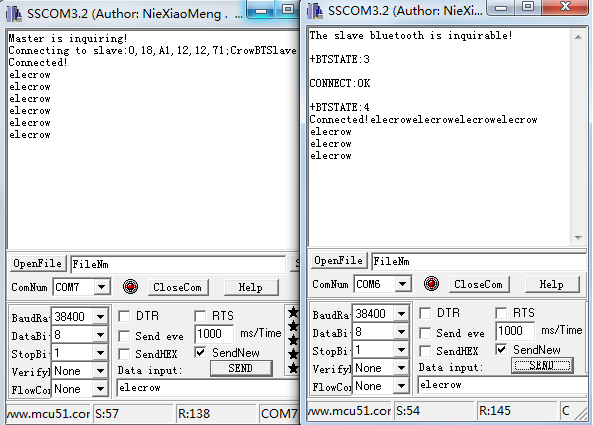
Then you will see the red and green LED on the board are flashing in interval indicting they are inquiring for each other. After a while only the green led is flashing one time per second indicating that they are connected. There's also some information printed on the two terminal as following.
6.The connection is successful now, and you can type any character on the Serial Terminal and send to each .
How to use Soft Serial to communicate with Xbee
- Download the SoftwareSerial library,
- Put it in Arduino IDE Libraries folder(arduino\libraries);
Version
| v1.0 | 2012/11/07 | Initial release |
|---|---|---|
Resource
FAQ
You can list your questions here or contact with our technology support email techsupport@elecrow.com.
