ESP32 HMI 2.8-inch MicroPython Tutorial
Overview
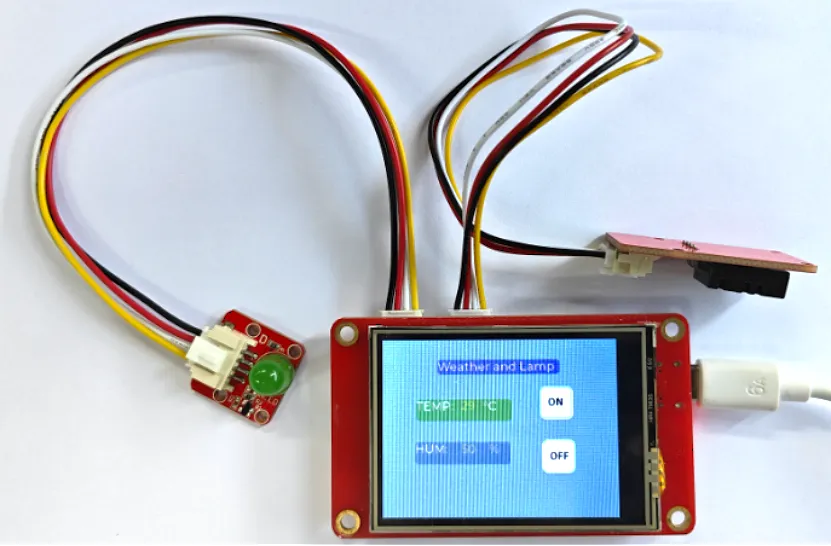
The example tutorial is an environmental monitoring project, demonstrate how to create a UI and use a DHT20 sensor to obtain the environment temperature and humidity and display it on the screen; and how to control the LED on and off by the buttons on the screen.
In this tutorial, we will show you how to design the UI with SquareLine Studio, and show you how to upload the code with Thonny IDE.
Hardware Preparation
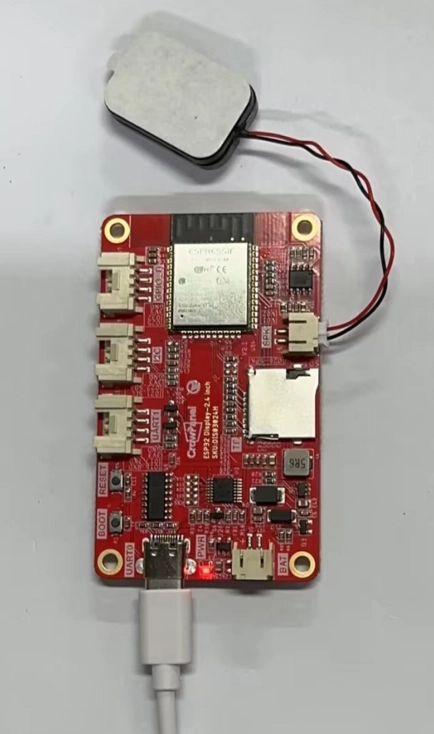
| CrowPanel ESP32 2.8'' HMI | Crowtail-DHT20 | Crowtail-LED |
|---|---|---|
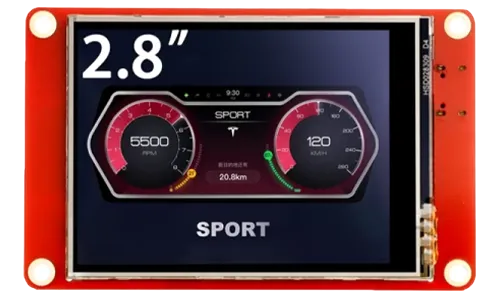 | 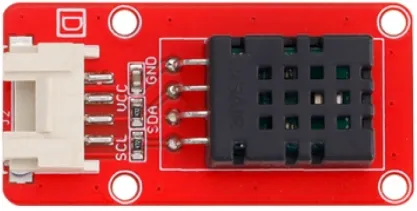 |  |
 | | |
Design UI file with SquareLine Studio
Get Started with SquareLine Studio
Please click the card below to learn how to download the SquareLine Studio, and how to export the demo UI file.

Design UI file with SquareLine Studio
Let's start learning how to create our own UI after getting an initial understanding of SquareLine Studio.
-
Open the SquareLine Studio and create a project. Select "Desktop"->"Micropython for Unix and other platform".

-
Set the name of the project, set the screen resolution to 320*240, set the color depth to 16bit, and keep other default settings. After setting, click CREATE to create the project.
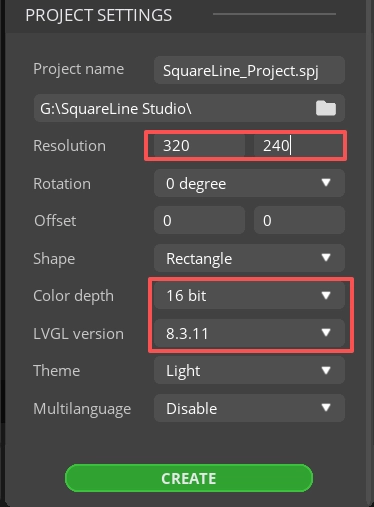
- 16-bit color depth: can represent 65,536 colors through RGB 5:6:5 sub-pixel representation, that is, each RGB channel occupies 5 bits and 1 bit (a total of 16 bits) to represent colors.
-
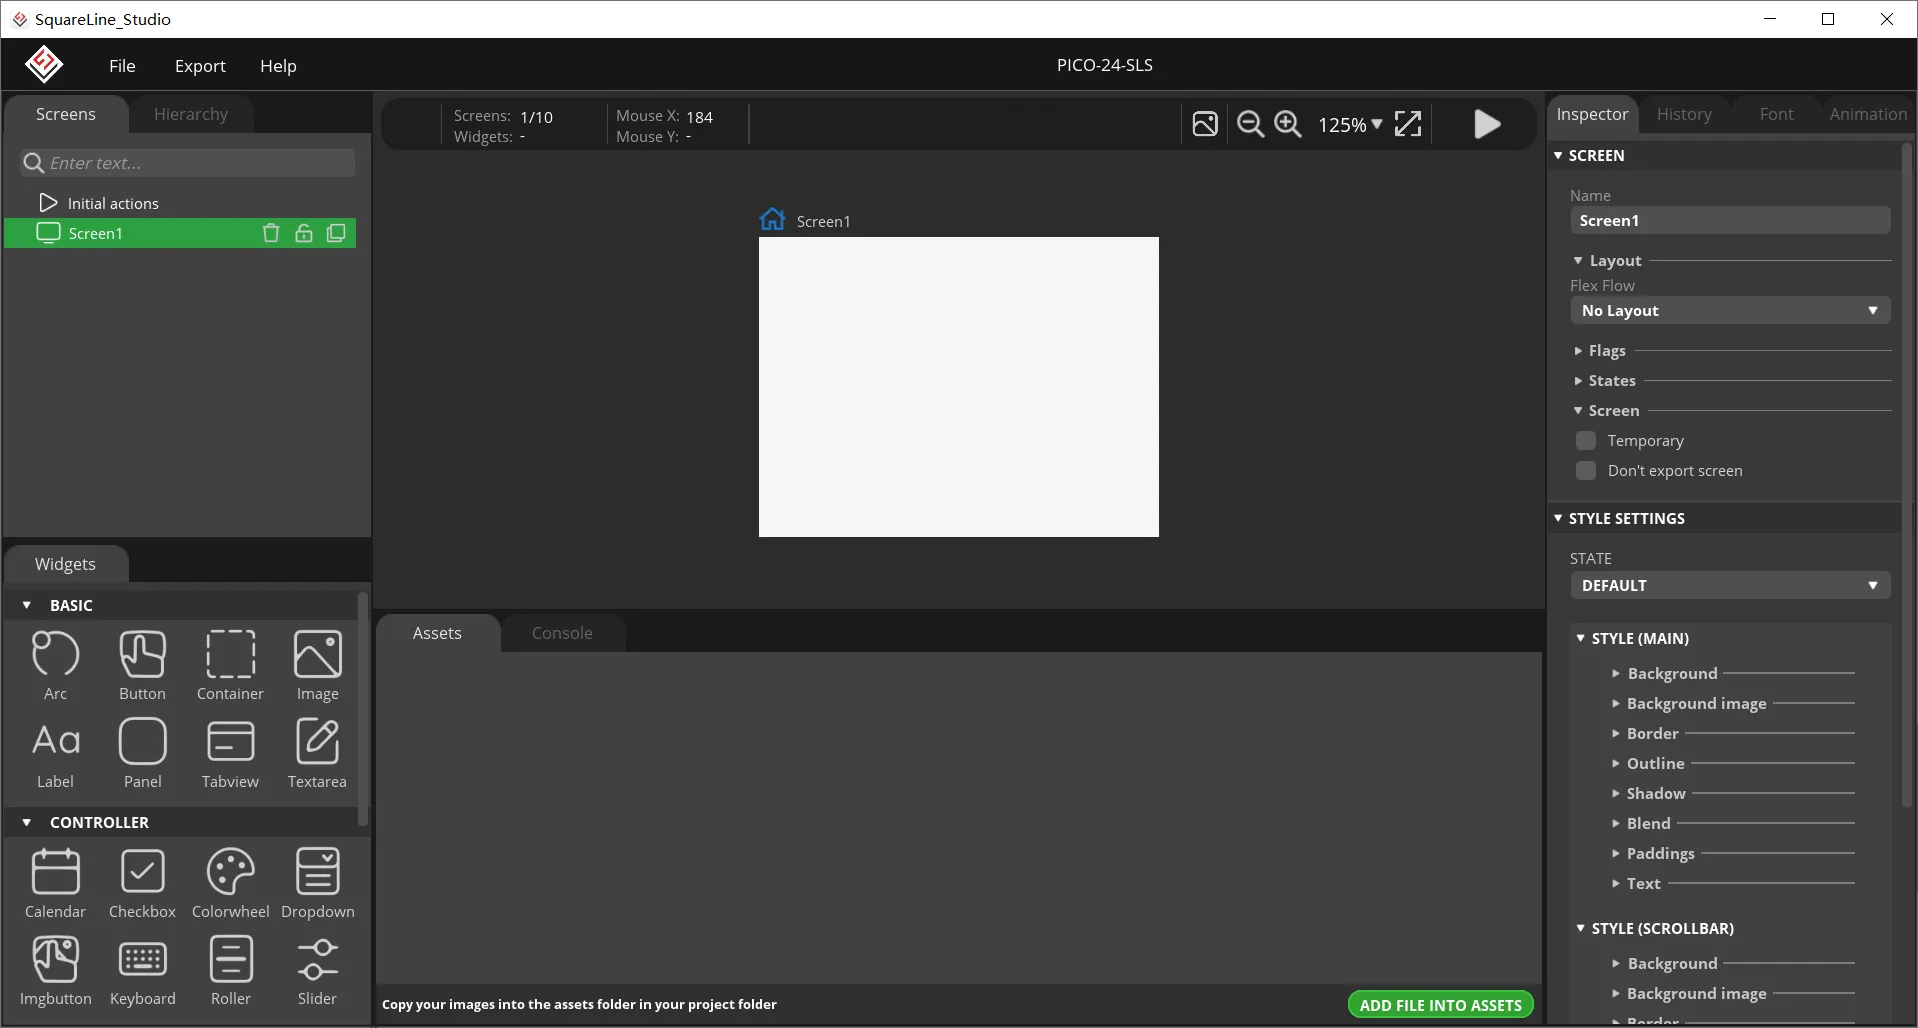
After creation, enter the following interface with a blank background.
-
Add background.
Find "Inspector"->"STYLE SETTING", click to expand "STYLE(MAIN)", then click the 1st "Background". Check the "Bg ColorAlpha" and set the backgroud color.

-
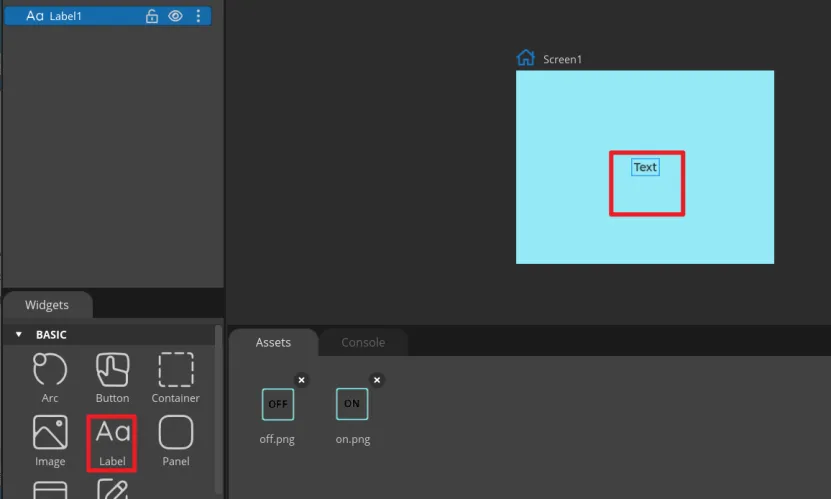
Add Label widget
Click "Label" in the "Widgets" area, and "Label1" will be added to the current Screen.
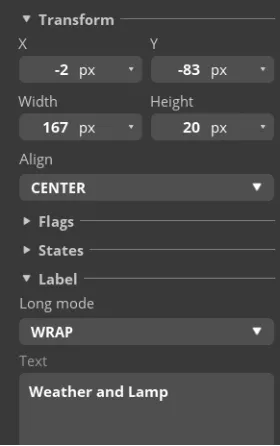
The content, position and size of the label can be adjusted by dragging the mouse. You can also directly enter numbers in the Inspector→LABEL→Transform to adjust. You can set the font color and other attributes in STYLE SETTING→STYLE(MAIN).
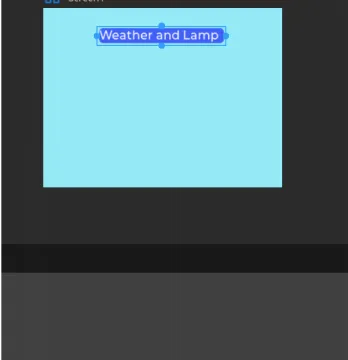
Modify the text of Label1 as the title of the screen.
Add Label2 and Label3 as labels for temperature and humidity in the same way.

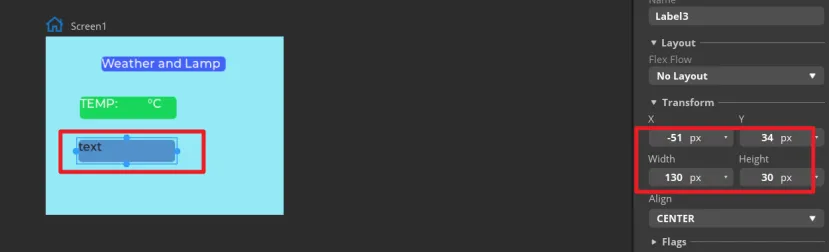
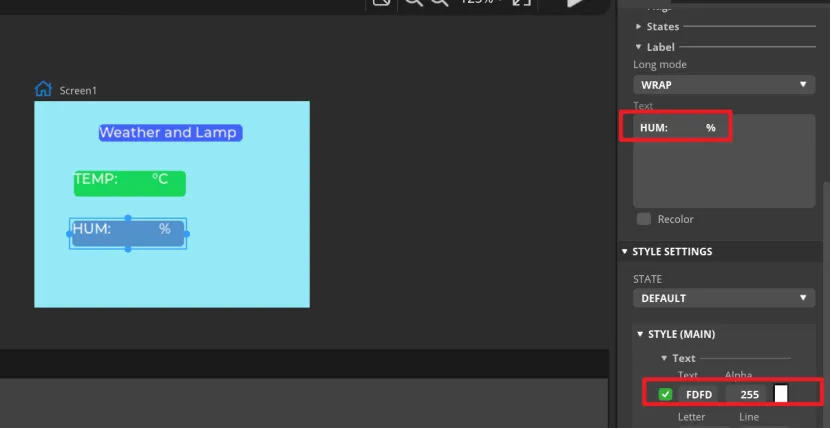
Add Label4 and Label5 to display the values of temperature and humidity
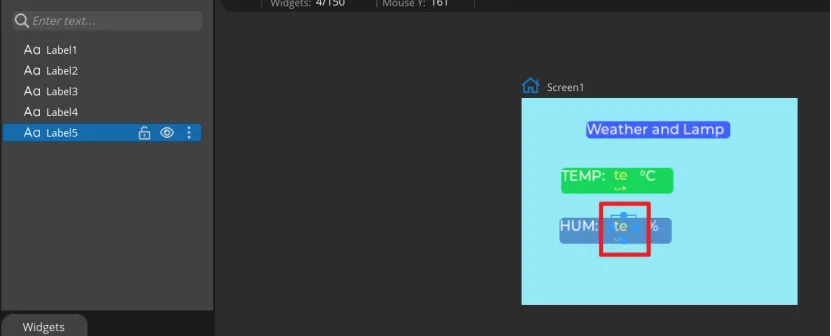
After all Labels are added, you can set the default display value of the Label.

-
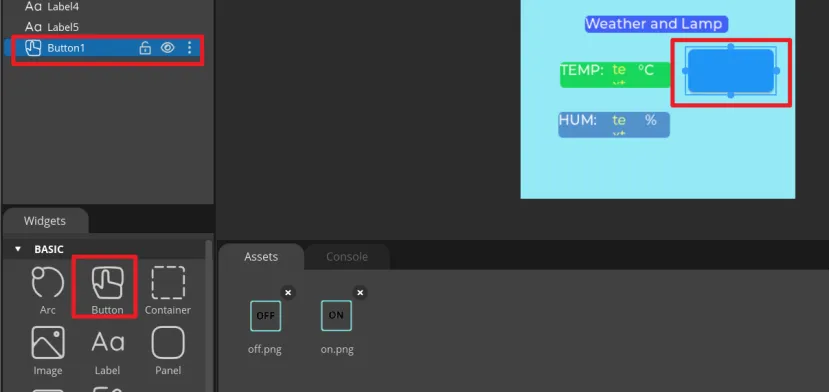
Add Button widget to control the LED.
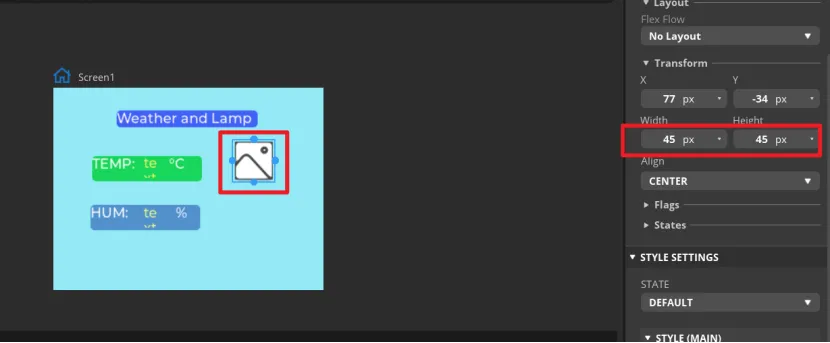
Click "Button" in the "Widgets" area, and "Button1" will be added to the current Screen.
The position and size of the label can be adjusted by dragging the mouse. You can also directly enter numbers in the Inspector→BUTTON→Transform to adjust.
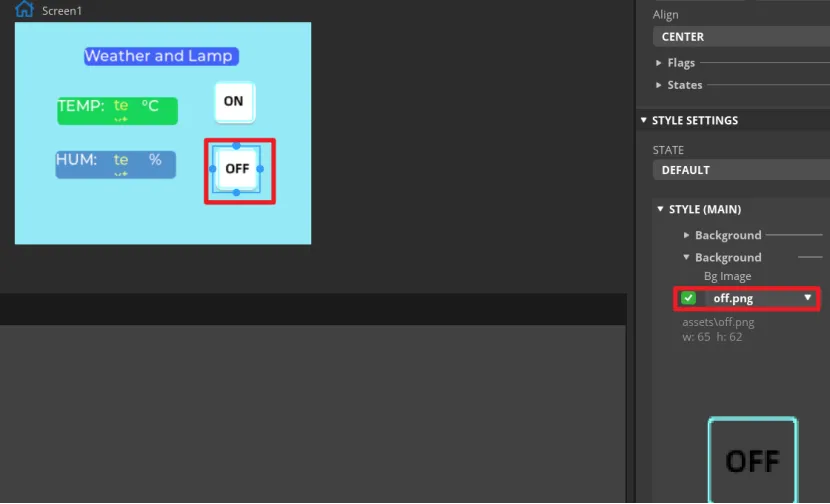
Add an identification symbol to the button. The button in this tutorial controls the LED switch, so you only need to mark the button "on" and "off". You can add LABEL widgets or add a background images to the button. This tutorial will demonstrate how to add a background image to a button.
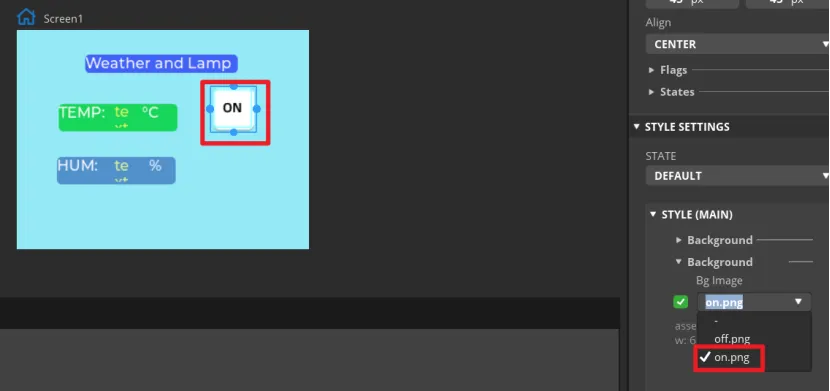
Click the Button1, then find Inspector->STYLE SETTINGS ->STYLE(MAIN) ->Background, and select the image.
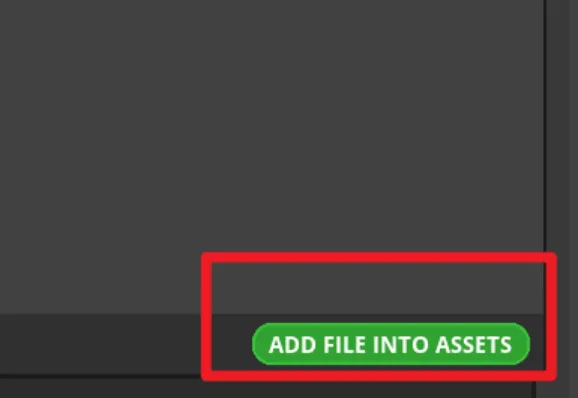
If you there are no pictures available, please click "ADD FILE TO ASSETS" to add custom images or icons in the "Assets" area.
Please click
 to download the custom images for the button.
Because UI files require a large amount of memory when running in Thonny IDE, the UI main page background in this tutorial does not use images to avoid being unable to run.
In the same way, duplicate a Button widget. And drag it to the corresponding position to modify different background image.

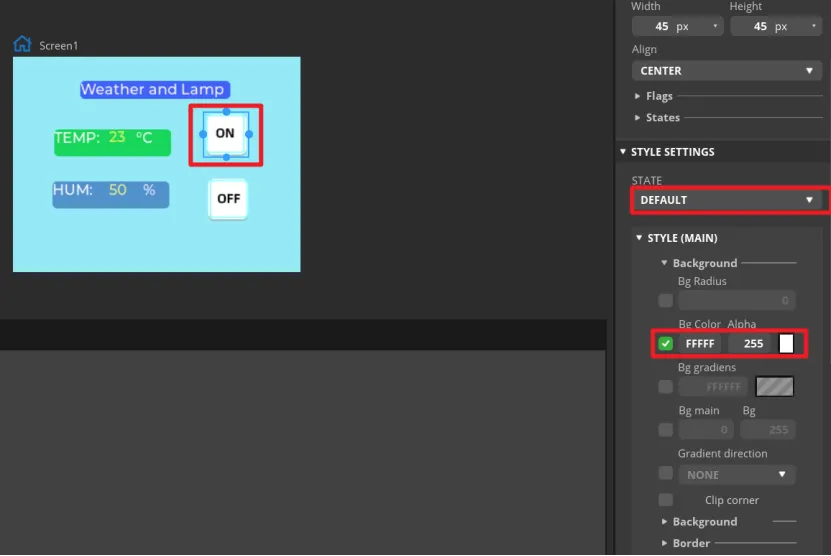
Set the status of the button to identify different states.
In "Inspector"->"STYLE SETTINGS"->"STATE", set display white background color by DEFAULT and red when on the PRESSED state.
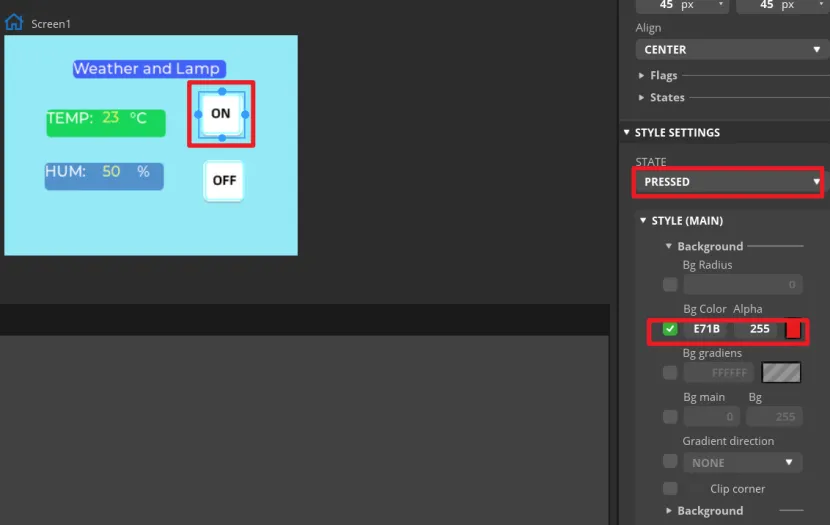
Make the same settings for the "OFF" button.
-
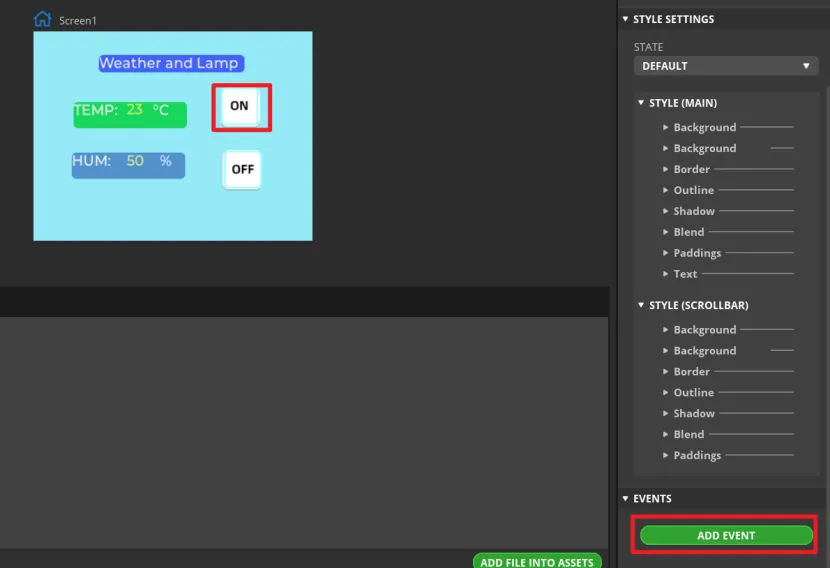
Add events to buttons.
Note: Because the button controls the on and off of the LED, we can add any event here to generate the code framework for the button event when exporting the UI file. We will modify the code of the button event to control the LED latter.
Select the button and click "ADD EVENT".
Select "released" as the trigger condition, select a trigger event in "Action". It will be modified in the generated program to achieve the LED control function.
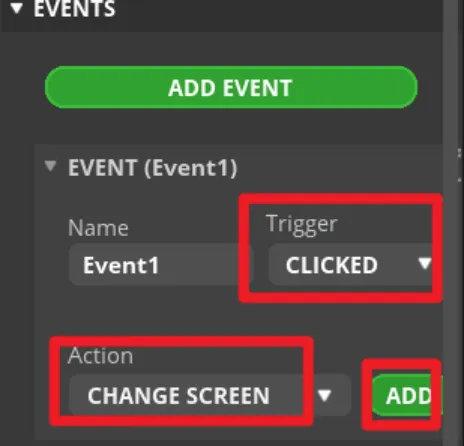
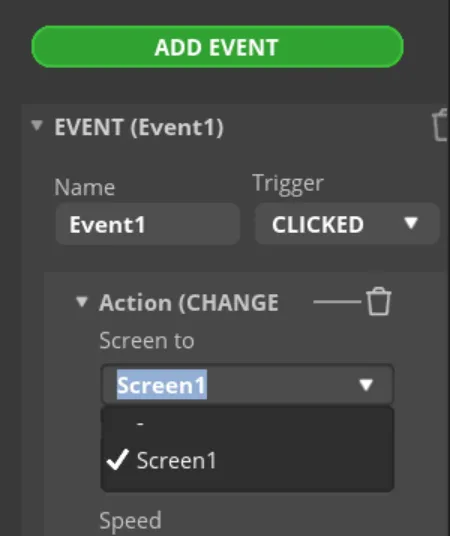
Complete the event. Here I choose to change the screen, and the screen to be switched is Screen1.
Add event to Button2 (OFF) in the same way.
-
Export UI files.
Click "File" -> "Project Settings" and make settings for the exported file.
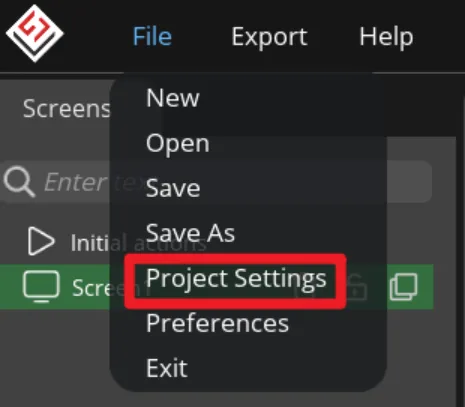
Set the export path of the file (set the path according to your own file).
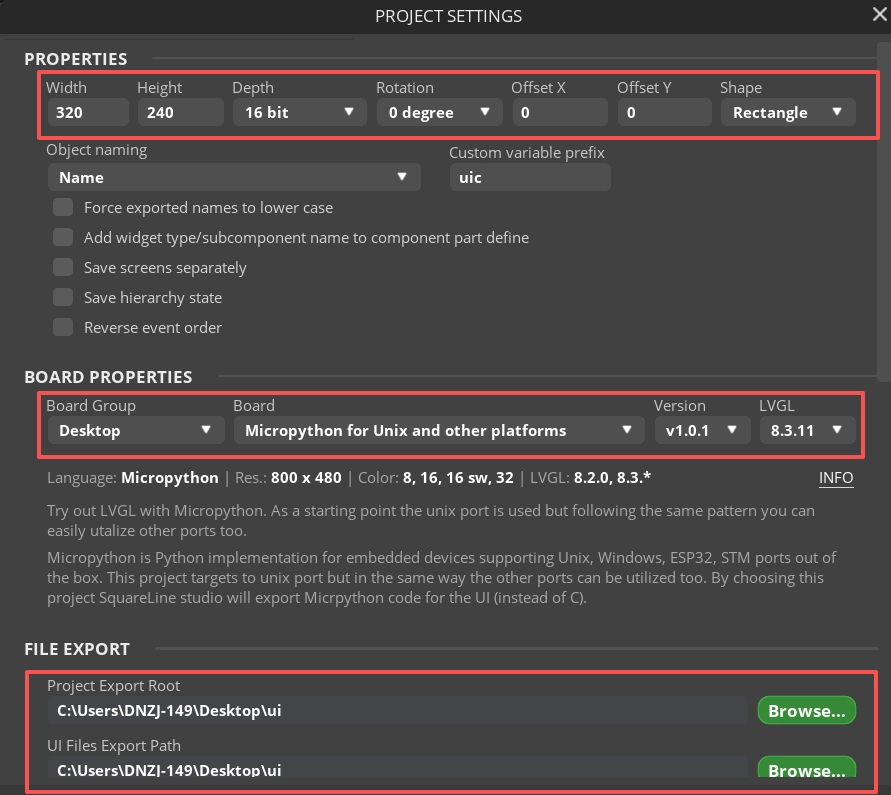
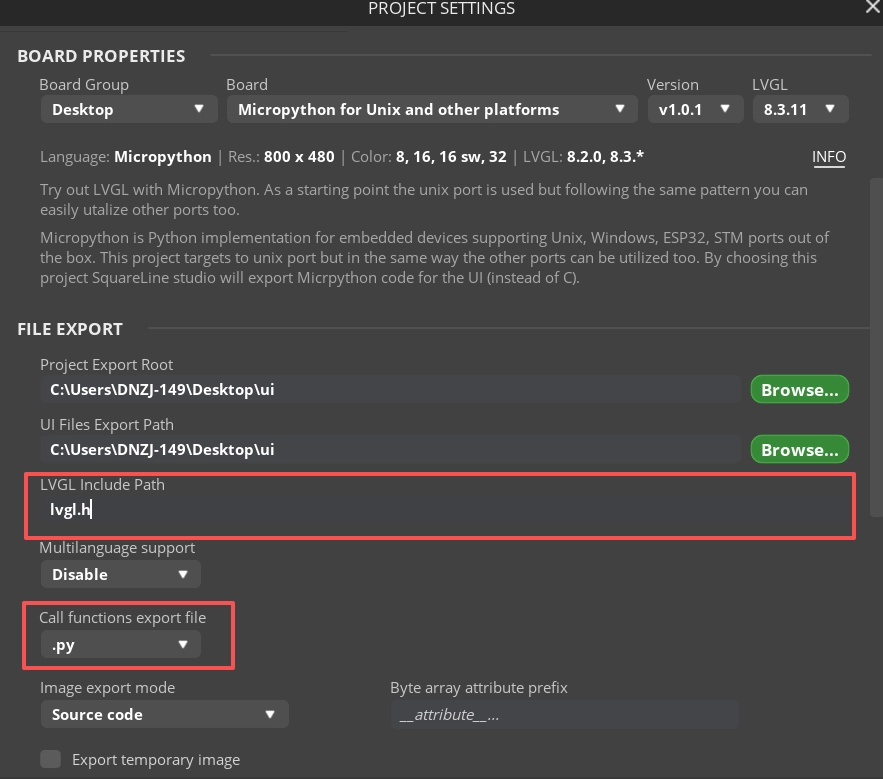
Fill in lvgl.h in LVGL Include Path. Check "Flat export(exports all files to one folder )".
Then click "APPLY CHANGES".
Export UI files. The exported files will be in the path we set earlier.
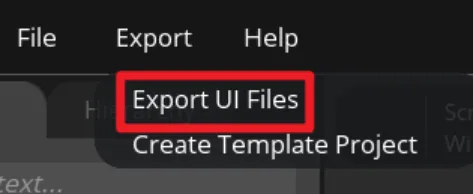
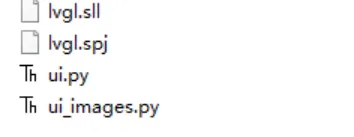
The UI file export is completed. Next we're going to learn about the main program and learn how to upload the code to the board with Thonny IDE.
Build the Project with Thonny IDE
Download Thonny IDE
-
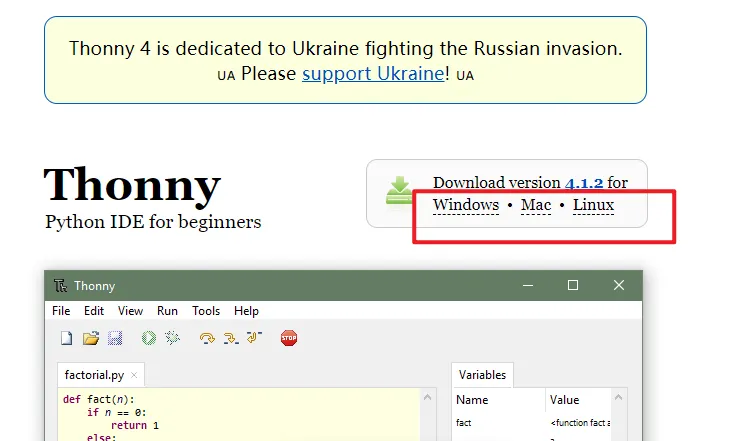
Go to the website https://thonny.org/ and download the corresponding software version (here we take the Windows version as an example)
Note: If the latest version of Thonny cannot run this project, please roll back to version 4.1.7.(https://github.com/thonny/thonny/releases/tag/v4.1.7)
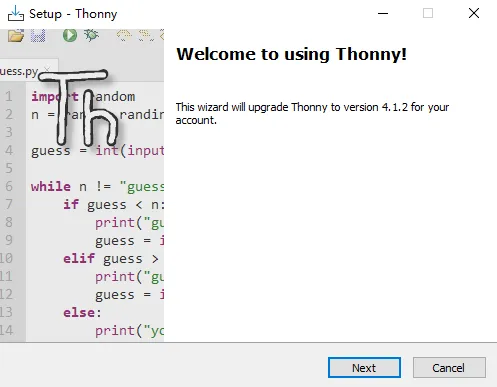
-
Double-click the downloaded exe file to install the software.
Upload firmware
Please click to download the bin file.
-
Connect the CrowPanel ESP32 HMI with your computer.
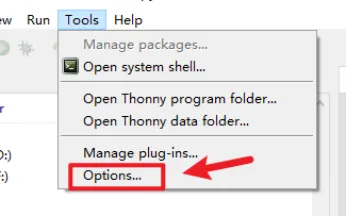
-
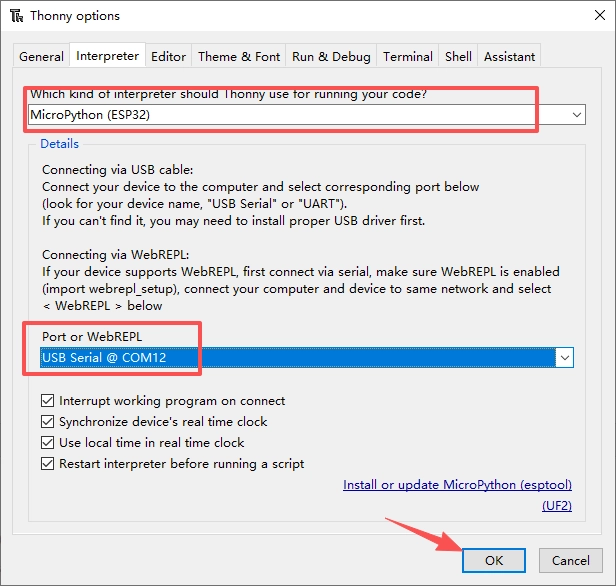
Open Thonny IDE and click "Tools"->"Options"->"Interpreter".
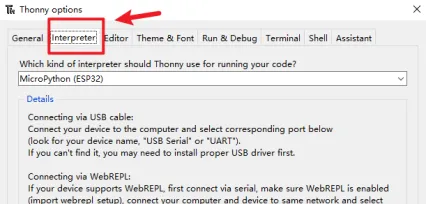
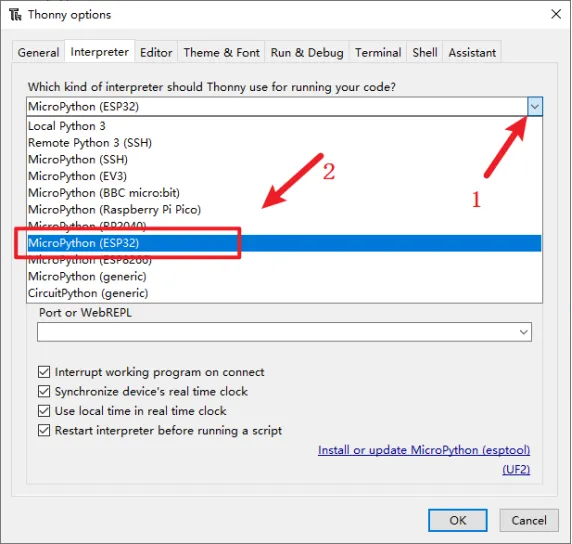
-
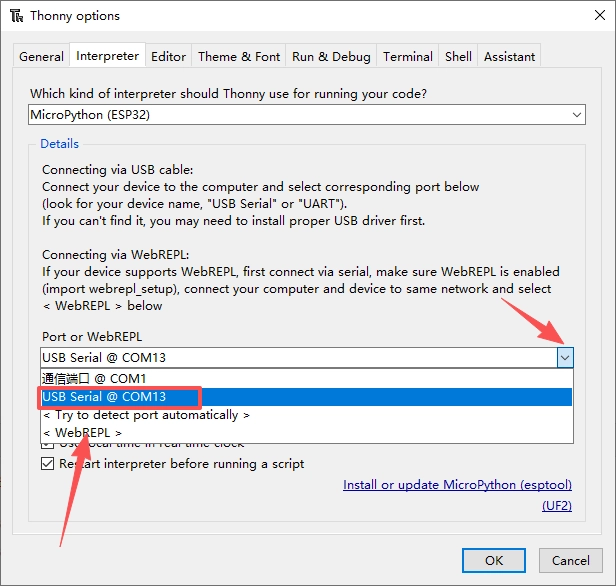
Select "MicroPython(ESP32)" for interpreter.
-
Select the corresponding serial port(or Try to detect port automatically).
-
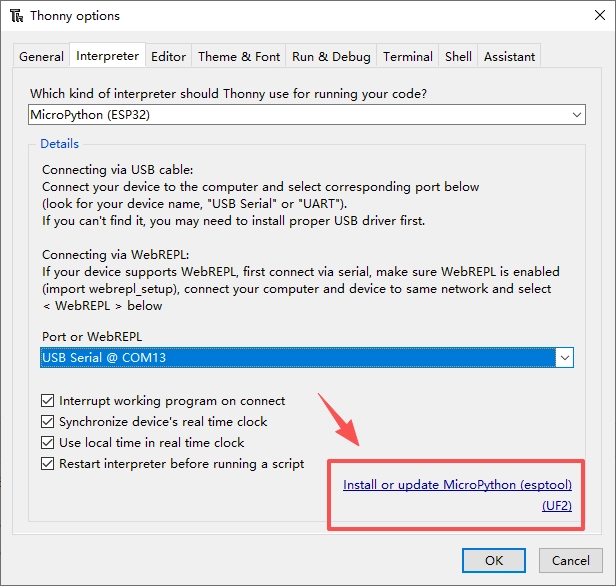
Click "Install or update MicroPython (esptool)"
-
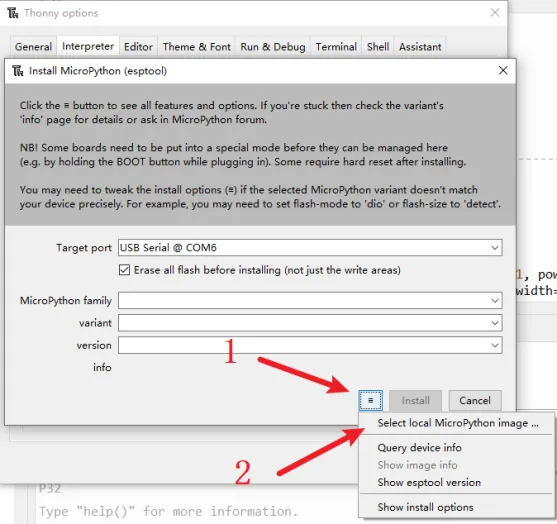
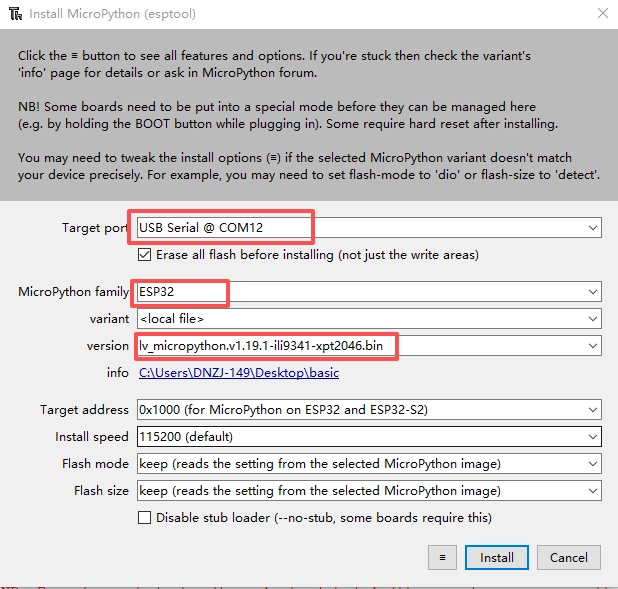
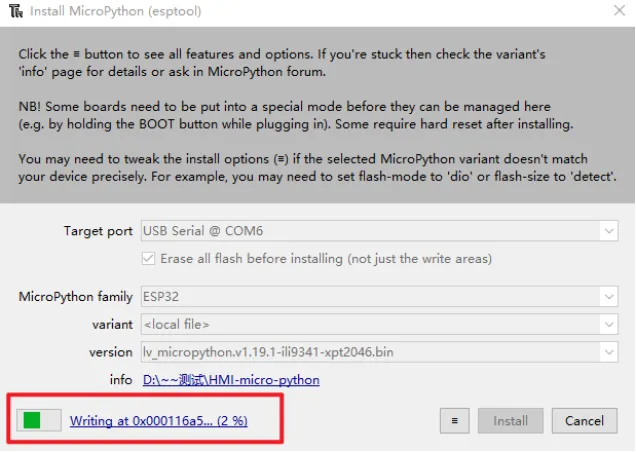
Click the icon with 3 lines, and click "select local MicroPython image...".Select the "lv_micropython.v1.19.1-ili9341-xpt2046.bin" and install.
-
Waiting for downloading...
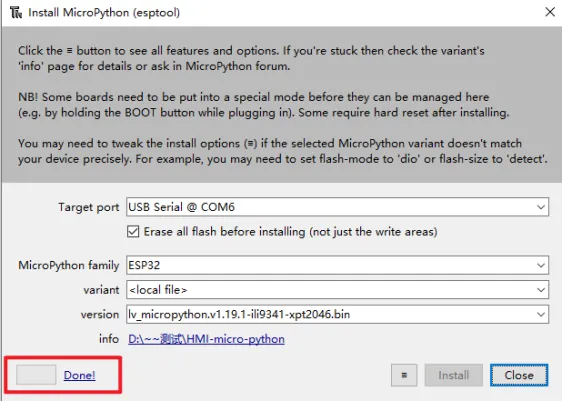
After successful addition, a boot.py file will appear in the lower-left corner.
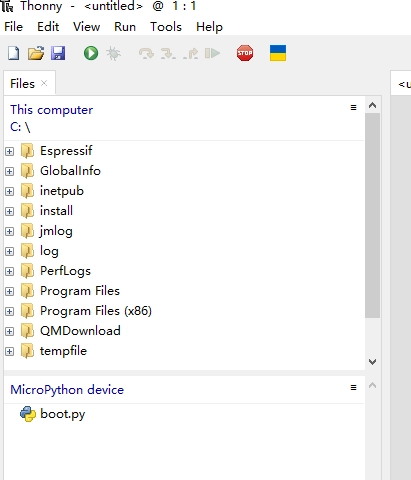
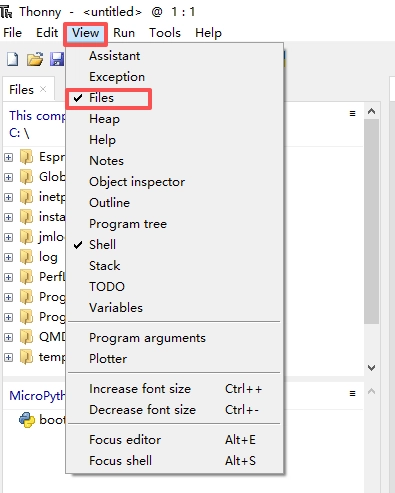
If it does not appear, check whether the extension files are enabled.
Upload the code
Please click to download the code file and libraries.
Upload the libraries
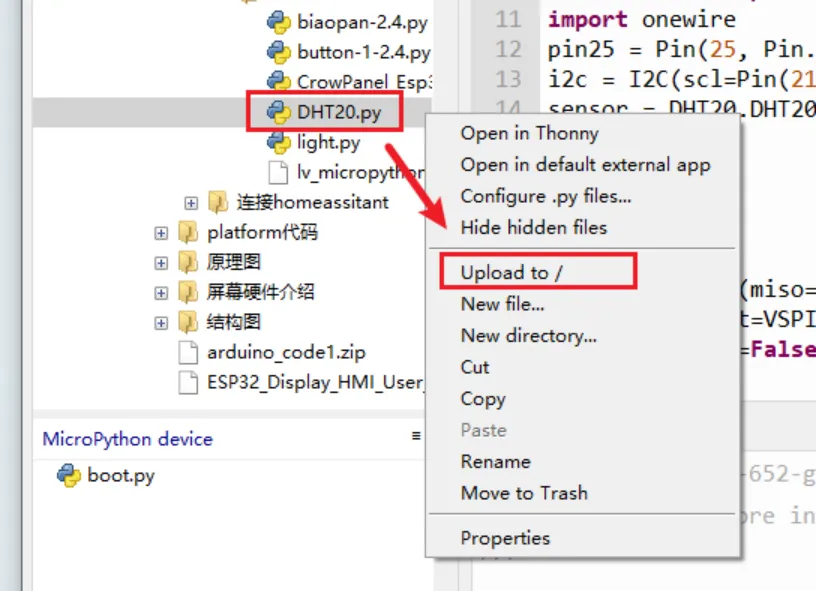
DHT20
- In the upper left corner of the thonny, enter the path where DHT20.py is located, right-click DHR20.py, and click Upload to/
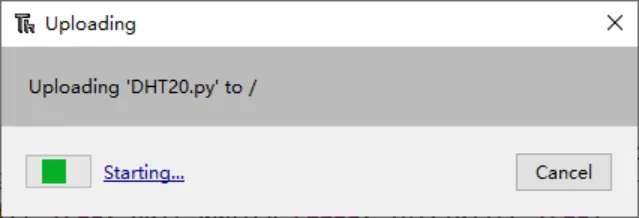
- Waiting for uploading
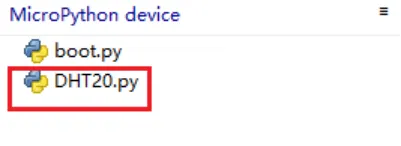
- The DHT20.py will be added to the MicroPython device column.
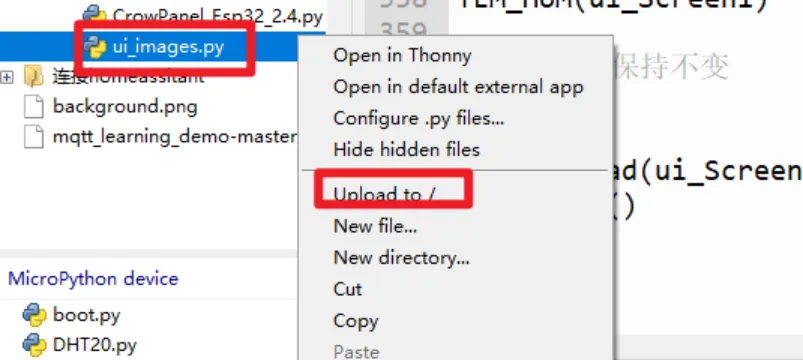
ui_image.py
- In the upper left corner of the thonny, enter the path where ui_image.py is located, right-click ui_image.py, and click Upload to/
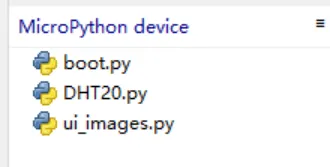
- ui_image.py is added to MicroPython device successfully.
Upload the code
Double-click to open the main program.Click the "run" icon.
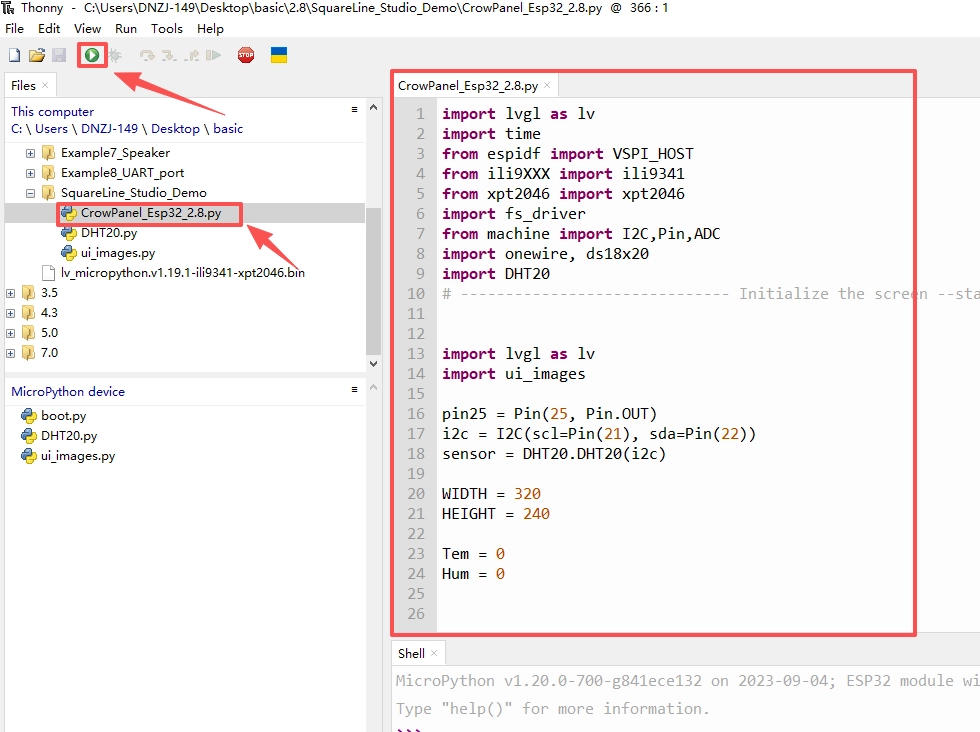
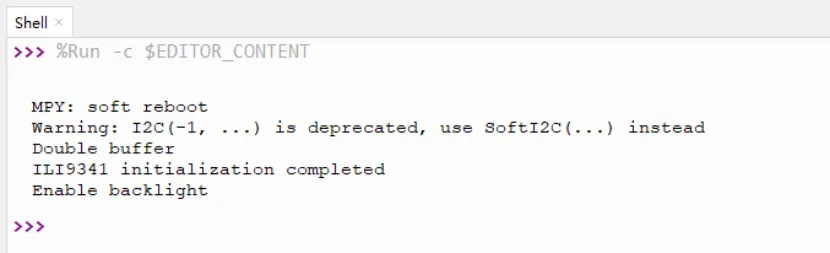
Successfully uploaded.
Code Explanation
Libraries imported in this example
import lvgl as lv
import time
from espidf import VSPI_HOST
from ili9XXX import ili9341
from xpt2046 import xpt2046
import fs_driver
from machine import I2C,Pin,ADC
import onewire, ds18x20
import DHT20
import ui_images
lvgl: This is a popular embedded graphics library for creating graphical user interfaces (GUIs). It allows developers to create complex user interfaces that support multiple display and input devices.
time: The time module in the Python standard library is used to handle time-related operations such as getting the current time, delays, etc.
espidf: This library is part of the ESP-IDF (Espressif IoT Development Framework) and provides access to ESP32 hardware features such as SPI communication.
VSPI_HOST: This is a class in the ESP-IDF library that is used to configure and control the VSPI (Very Simple Peripheral Interface) host interface.
ili9341: This is a library for driving the ILI9341 LCD display. The ILI9341 is a common TFT LCD display driver IC.
xpt2046: This library is used to drive the XPT2046 touch controller, which is commonly used in touchscreen devices to provide touch detection capabilities.
fs_driver: This library is for the file system driver, allowing file read and write operations on the ESP32.
DHT20: This library is used to drive the DHT22 temperature and humidity sensor, which can read the ambient temperature and humidity.
machine: This is a module of MicroPython that provides direct access to machine hardware, such as I2C, SPI, GPIO, etc.
I2C: This is a class in the machine module that implements the I2C communication protocol and is often used to connect low-speed devices.
Pin: It is also a class in the machine module that is used to control GPIO (general input and output) pins.
ADC: This is the class of the analog-to-digital converter, which is used to read analog signals and convert them into digital values.
onewire: This library is used to implement the OneWire communication protocol, which is often used to connect devices such as the temperature sensor DS18B20.
Basic Definition
Set up the hardware interface and initialize the sensor so that the subsequent program can read the temperature and humidity data and control the LCD display.
pin25 = Pin(25, Pin.OUT) # Set GPIO pin 25 to output mode
i2c = I2C(scl=Pin(21), sda=Pin(22)) # Initialize the I2C bus and specify the GPIO pins for SCL (pin21) and SDA (pin 22)
sensor = DHT20.DHT20(i2c) # Create an instance of the DHT20 temperature and humidity sensor, using the I2C bus initialized above

# Define the width and height of the LCD display
WIDTH = 320
HEIGHT = 240
Screen driver and touch driver initialization
# Initialize the ili9341 display driver and configure its connection parameters with ESP32
disp = ili9341(miso=12, mosi=13, clk=14, cs=15, dc=2, rst=-1, power=0, backlight=27, backlight_on=-1, power_on=1, rot=0x30,
        spihost=VSPI_HOST, mhz=60, factor=16, hybrid=True, width=WIDTH, height=HEIGHT,
        invert=False, double_buffer=True, half_duplex=False, initialize=True)

# Initialize the xpt2046 touch screen controller and configure its connection parameters with ESP32
touch = xpt2046(cs=33, spihost=VSPI_HOST, mosi=-1, miso=-1, clk=-1, cal_y0 = 423, cal_y1=3948,transpose = 0)
Screen
-
miso, mosi, clk: SPI communication input, output and clock pins respectively
-
cs, dc: chip select and data/command control pins respectively
-
rst: reset pin, set to -1 here to indicate not used
-
power: power control pin, set to 0 here to indicate not used
-
backlight: backlight control pin, set to 27
-
backlight_on: backlight on state, set to -1 here to indicate not used
-
power_on: power on state, set to 1
-
rot: screen rotation parameter (0x30 indicates horizontal display)
-
spihost: SPI host used, VSPI_HOST is used here
-
mhz: SPI communication frequency, set to 60MHz
-
factor: a factor related to display performance, set to 16
-
hybrid: whether to use hybrid mode
-
width, height: width and height of the display, consistent with WIDTH and HEIGHT defined above
-
invert: whether to invert colors
-
double_buffer: whether to use double buffering
-
half_duplex: whether to use half-duplex mode
-
initialize: whether to initialize the display
Touch
- cs: chip select pin, set to 33
- spihost: SPI host used, here use VSPI_HOST
- mosi, miso, clk: Since xpt2046 is a touch screen controller, these pins are usually not needed, so set to -1
- cal_y0, cal_y1: touch screen calibration parameters
- transpose: whether to transpose the touch screen coordinates (0 means flip, 1 means no flip)
UI display code
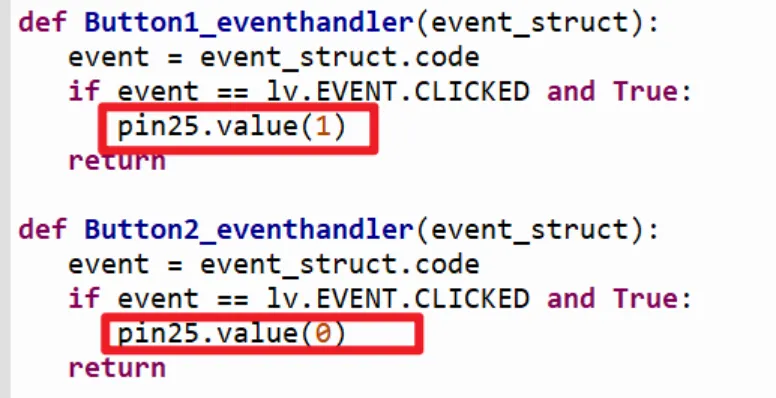
This part copies the code of ui.py generated by Squareline Studio. We need to modify the part that control the button.
From
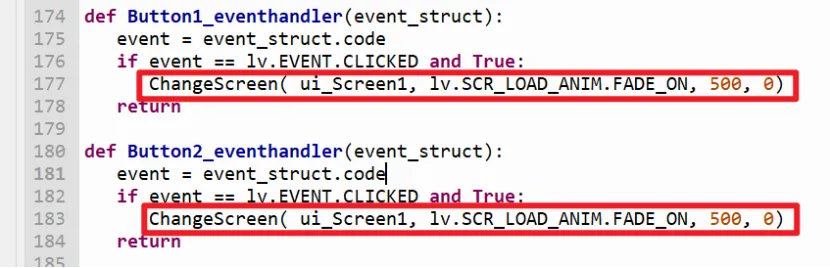
to
Temperature and humidity display
Define a class named TEM_HUM to display temperature and humidity information in the LVGL GUI.
sensor.read_dht20()
class TEM_HUM():
    def __init__(self, ui_Screen1):
        # Read the temperature and humidity values of the DHT20 sensor
        global Tem, Hum
        Tem = sensor.dht20_temperature()
        Hum = sensor.dht20_humidity()

        # Update the temperature and humidity display on the UI interface
        ui_Label4.set_text(f"{round(Tem)} °C")  # Update temperature
        ui_Label5.set_text(f"{round(Hum)} %")       # Update humidity
Create a function to display and update temperature and humidity.
# Make sure the TEM_HUM class is instantiated in the program and ui_Screen1 is passed as a parameter
def update_temperature_humidity():
    global Tem, Hum
    # Read the temperature and humidity values of the DHT20 sensor
    sensor.read_dht20()  # Make sure read_dht20() is called to update the sensor data
    Tem = sensor.dht20_temperature()
    Hum = sensor.dht20_humidity()

    # Update the temperature and humidity display on the UI interface
    ui_Label4.set_text(f"{round(Tem)}")
    ui_Label5.set_text(f"{round(Hum)}")
Main Loop
Define the main loop function main_loop to continuously update the temperature and humidity display on the UI interface.
def main_loop():
    while True:
        update_temperature_humidity()
        time.sleep(1)  # Pause for 10 seconds and then update again

TEM_HUM(ui_Screen1)

lv.scr_load(ui_Screen1)
main_loop()
GPIO Examples
Please click to download the code files.
Note! You need to reflash the firmware for each project, otherwise errors may occur.
Example 1 Turn on/off the LED in a loop
Connect an LED module to the D port(pin25) of ESP32 2.8'' HMI, and upload the following code. The LED will turn on and off in a loop.

#Make by Elecrow
#Web:www.elecrow.com

import time
from machine import Pin
pin25 = Pin(25, Pin.OUT)
while True:

    pin25.value(1)
    time.sleep(0.5)
    pin25.value(0)
    time.sleep(0.5)
Example 2 Turn on/off the LED with a button
Connect an LED module to the D port(pin25), and connect a button to the UART_1 port(pin16). Upload the following code, then you can control the LED on/off by pressing the button.

from machine import Pin
import time

led = Pin(25, Pin.OUT)


button = Pin(16, Pin.IN, Pin.PULL_UP)


led.value(0)

while True:

    if not button.value():

        led.value(1)
    else:

        led.value(0)

    time.sleep(0.1)
Example 3 Obtain temperature and humidity value
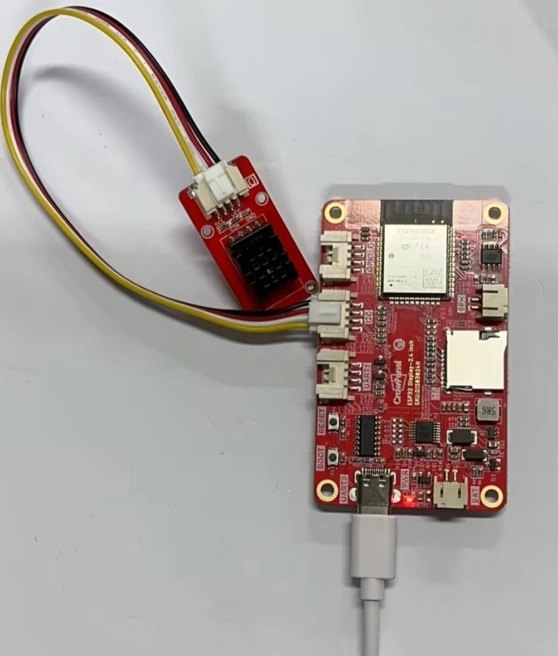
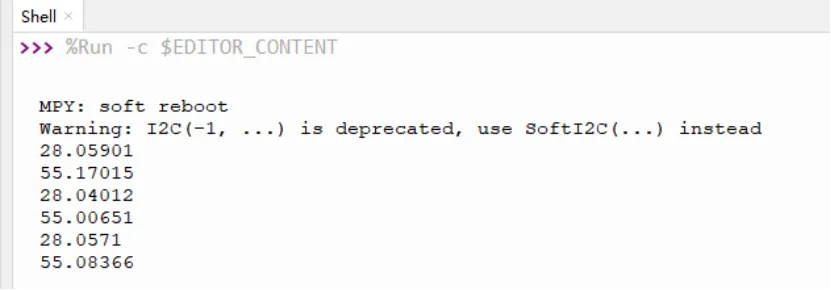
Plug DHT20 module to the IIC port. Add DHT20.py to the device(check the method in "Upload the libraries" section.) and upload the code below, the value of temperature and humidity will be printed.
import time
import DHT20
from machine import I2C, Pin
i2c = I2C(scl=Pin(21), sda=Pin(22))
sensor = DHT20.DHT20(i2c)

while True:
    sensor.read_dht20()
    print(sensor.dht20_temperature())
    print(sensor.dht20_humidity())
    time.sleep_ms(4000)
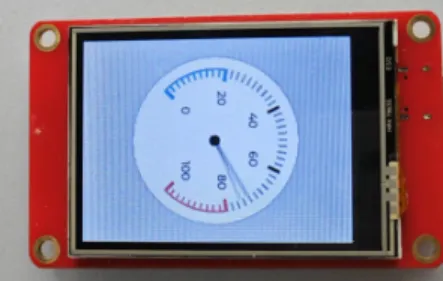
Example 4 Show dial plate on the screen
Upload the following code to the module, there will be a dial plate show on the screen.
#Make by Elecrow
#Web:www.elecrow.com
import lvgl as lv
import time
from espidf import VSPI_HOST
from ili9XXX import ili9341
from xpt2046 import xpt2046
import fs_driver
from machine import Pin
import onewire, ds18x20

# ------------------------------ Initialize the screen --start------------------------

WIDTH = 240
HEIGHT = 320


# Creating the display object
disp = ili9341(miso=12, mosi=13, clk=14, cs=15, dc=2, rst=-1, power=0, backlight=27, backlight_on=-1, power_on=1, rot=0x80,
        spihost=VSPI_HOST, mhz=60, factor=16, hybrid=True, width=WIDTH, height=HEIGHT,
        invert=False, double_buffer=True, half_duplex=False, initialize=True)

# Create a touch screen object
touch = xpt2046(cs=25, spihost=VSPI_HOST, mosi=-1, miso=-1, clk=-1, cal_y0 = 423, cal_y1=3948)
# --------------------------------stop------------------------


# 1. Create a display screen. Will need to display the component added to the screen to display
scr = lv.obj()  # scr====> screen
fs_drv = lv.fs_drv_t()
fs_driver.fs_register(fs_drv, 'S')
scr = lv.scr_act()
scr.clean()


# 2. Encapsulate the component to display
class MyWidget():
    def __init__(self, scr):
        # 1. Create the dashboard object
        self.meter = lv.meter(scr)
        self.meter.center()
        self.meter.set_size(200, 200)  # width: 200 height: 200

        # 2. To create calibration object
        scale = self.meter.add_scale()

        self.meter.set_scale_ticks(scale, 51, 2, 10, lv.palette_main(lv.PALETTE.GREY))

        self.meter.set_scale_major_ticks(scale, 10, 4, 15, lv.color_black(), 20)

        # 3. Add warning scale line

        blue_arc = self.meter.add_arc(scale, 2, lv.palette_main(lv.PALETTE.BLUE), 0)
        self.meter.set_indicator_start_value(blue_arc, 0)
        self.meter.set_indicator_end_value(blue_arc, 20)


        blue_arc_scale = self.meter.add_scale_lines(scale, lv.palette_main(lv.PALETTE.BLUE), lv.palette_main(lv.PALETTE.BLUE), False, 0)
        self.meter.set_indicator_start_value(blue_arc_scale, 0)
        self.meter.set_indicator_end_value(blue_arc_scale, 20)


        red_arc = self.meter.add_arc(scale, 2, lv.palette_main(lv.PALETTE.RED), 0)
        self.meter.set_indicator_start_value(red_arc, 80)
        self.meter.set_indicator_end_value(red_arc, 100)


        red_arc_scale = self.meter.add_scale_lines(scale, lv.palette_main(lv.PALETTE.RED), lv.palette_main(lv.PALETTE.RED), False, 0)
        self.meter.set_indicator_start_value(red_arc_scale, 80)
        self.meter.set_indicator_end_value(red_arc_scale, 100)

        # 4. meter needle
        self.indic = self.meter.add_needle_line(scale, 4, lv.palette_main(lv.PALETTE.GREY), -10)

        # 5. Creating animated objects
        a = lv.anim_t()
        a.init()
        a.set_var(self.indic)
        a.set_values(0, 100)
        a.set_time(2000)
        a.set_repeat_delay(100)
        a.set_playback_time(500)
        a.set_playback_delay(100)
        a.set_repeat_count(lv.ANIM_REPEAT_INFINITE)
        a.set_custom_exec_cb(self.set_value)
        lv.anim_t.start(a)

    def set_value(self, anmi_obj, value):
        """Animation callbacks"""
        self.meter.set_indicator_value(self.indic, value)


# 3. Create the component to display
MyWidget(scr)

# 4. Displays the contents of the screen object
lv.scr_load(scr)


# ------------------------------ Guard dog to restart ESP32 equipment --start------------------------
try:
    from machine import WDT
    wdt = WDT(timeout=1000)  # enable it with a timeout of 2s
    print("Hint: Press Ctrl+C to end the program")
    while True:
        wdt.feed()
        time.sleep(0.9)
except KeyboardInterrupt as ret:
    print("The program stopped running, ESP32 has restarted...")
    time.sleep(10)
# ------------------------------ Guard dog to restart ESP32 equipment --stop-------------------------
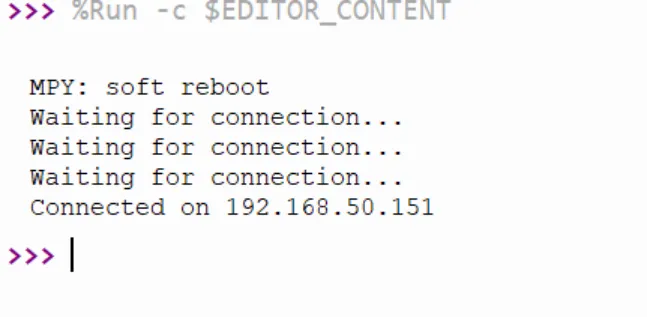
Example 5 Connect WiFi
Upload the following code to ESP32 HMI(note to modify the WiFi ssid and password to yours)
import network
import time

def connect():
    ssid = 'yanfa_software'
    password = 'yanfa-123456'

    wlan = network.WLAN(network.STA_IF)  # Create a WLAN object in station mode
    wlan.active(True)  # Activate the network interface
    wlan.connect(ssid, password)  # Connect to the specified WiFi network

    while not wlan.isconnected():  # Wait for the connection to be established
        print('Waiting for connection...')
        time.sleep(1)

    print('Connected on {ip}'.format(ip=wlan.ifconfig()[0]))  # Print the IP address

connect()
Running result:
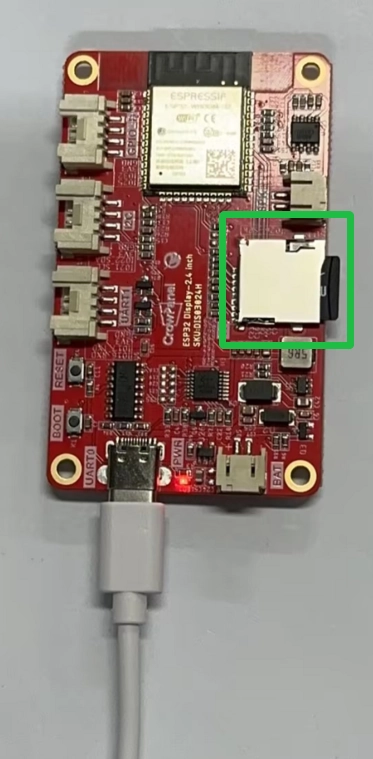
Example 6 Initialize SD card
Upload the following code to ESP32 HMI
Note: Please use an SD card formatted in FAT; otherwise, it may not be recognized.
import machine
import os
import sdcard
import uos
# SD Card Initialization
def init_sd():
# Creating SPI Objects
spi = machine.SPI(2, baudrate=1000000, polarity=0, phase=0, sck=machine.Pin(18), mosi=machine.Pin(23), miso=machine.Pin(19))
cs = machine.Pin(5, machine.Pin.OUT)
# SD Card Initialization
sd = sdcard.SDCard(spi, cs)
vfs = uos.VfsFat(sd)
uos.mount(vfs, "/sd")
print("SD card initialization complete")
print("List of documents:", os.listdir("/sd"))
# write to a file
def write_file(filename, data):
with open("/sd/" + filename, "w") as file:
file.write(data)
print("Data has been written to file:", filename)
# Read file
def read_file(filename):
with open("/sd/" + filename, "r") as file:
data = file.read()
print("readout:", data)
return data
# Example: Initialize SD card and read/write files
def main():
init_sd()
filename = "example.txt"
data = "Hello, SD Card!"
write_file(filename, data)
read_file(filename)
if __name__ == "__main__":
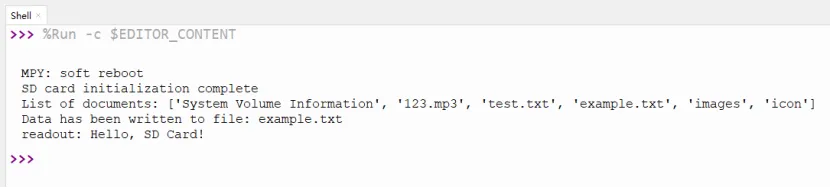
main()
Running result:
Example 7 Playing music
Connect a speaker to the ESP32 HMI. Upload the following code. ESP32 HMI will play the song 'Twinkle Twinkle Little Star'.
import math
import time
from machine import Pin, DAC


NOTE_C5 = 523
NOTE_D5 = 587
NOTE_E5 = 659
NOTE_F5 = 698
NOTE_G5 = 784
NOTE_A5 = 880


TwinkleTwinkle = [
    NOTE_C5, NOTE_C5, NOTE_G5, NOTE_G5, NOTE_A5, NOTE_A5, NOTE_G5,
    NOTE_F5, NOTE_F5, NOTE_E5, NOTE_E5, NOTE_D5, NOTE_D5, NOTE_C5,
    NOTE_G5, NOTE_G5, NOTE_F5, NOTE_F5, NOTE_E5, NOTE_E5, NOTE_D5,
    NOTE_G5, NOTE_G5, NOTE_F5, NOTE_F5, NOTE_E5, NOTE_E5, NOTE_D5,
    NOTE_C5, NOTE_C5, NOTE_G5, NOTE_G5, NOTE_A5, NOTE_A5, NOTE_G5,
    NOTE_F5, NOTE_F5, NOTE_E5, NOTE_E5, NOTE_D5, NOTE_D5, NOTE_C5
]

DURATION = 500

dac = DAC(Pin(26))

def play_tone(frequency, duration_ms):

    if frequency == 0:
        time.sleep_ms(duration_ms)
        return

    SAMPLE_RATE = 10000
    samples_per_cycle = int(SAMPLE_RATE / frequency)

    wave_table = []
    for i in range(samples_per_cycle):
        angle = 2 * math.pi * i / samples_per_cycle
        sample = int(128 + 127 * math.sin(angle))

        sample = max(0, min(255, sample))
        wave_table.append(sample)


    total_samples = int(SAMPLE_RATE * duration_ms / 1000)


    for i in range(total_samples):
        dac.write(wave_table[i % samples_per_cycle])
        time.sleep_us(100)

def play_melody(melody, duration_ms):
    for note in melody:
        play_tone(note, duration_ms)
        time.sleep_ms(50)

def setup():
    print("play music...")
    play_melody(TwinkleTwinkle, DURATION)

def loop():
    while True:
        pass

setup()
loop()
Example 8 Initialize UART port
Upload the following code
import machine
import time
# Initialize UART
uart = machine.UART(1, baudrate=115200, tx=17, rx=16)
def send_data(data):
uart.write(data) # Send data via UART
print("Sent:", data)
def receive_data():
if uart.any(): # Check for readable data
data = uart.read() # retrieve data
print("Received:", data)
return data
return None
# Example: Sending and Receiving Data
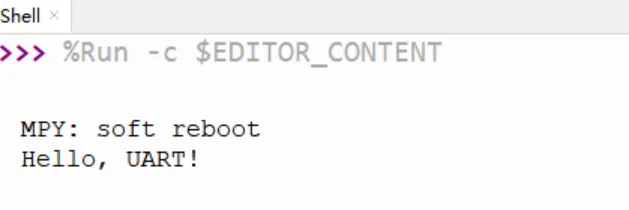
send_data('Hello, UART!\n')
while True:
received = receive_data()
if received:
# do something about it
pass
time.sleep(1)
Running result: