Thinknode G1 Quick guide
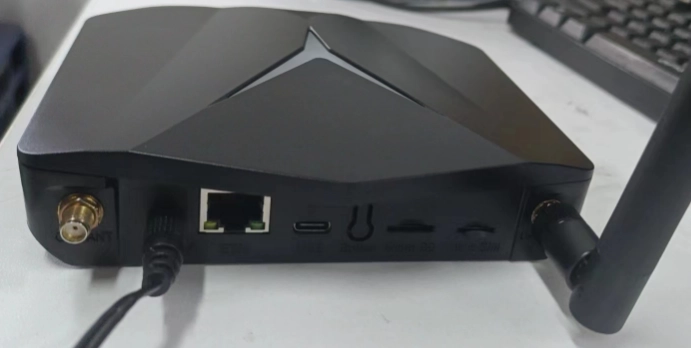
1、 Lora antenna installation and DC12 power access, Lora antenna has a band distinction, such as 868MHZ,915MHZ, different bands of Lora gateway, please install the corresponding band antenna, the physical wiring diagram is as follows:
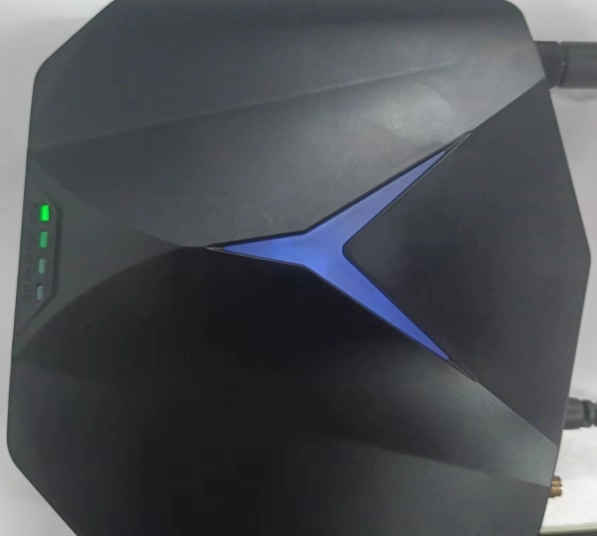
2、 After connecting the power supply, long press the setup button on the side of the gateway for 5S, wait for the gateway to enter the configuration mode, when the blue status light on the gateway flashes slowly, it means that the gateway enters the setup state!

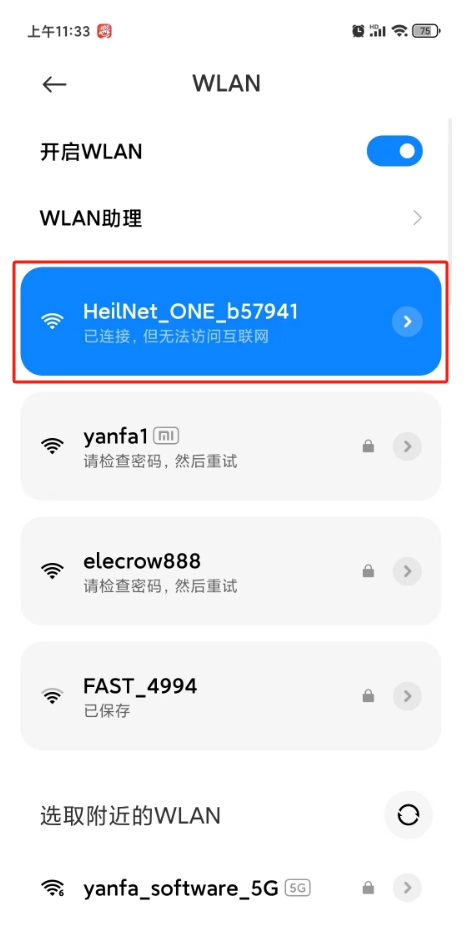
3、 After entering the configuration mode, connect the gateway AP, login Luci network configuration interface ,Use a cell phone or a computer/laptop with a wireless port to connect to the gateway AP-“HeilNet_ONE__**”
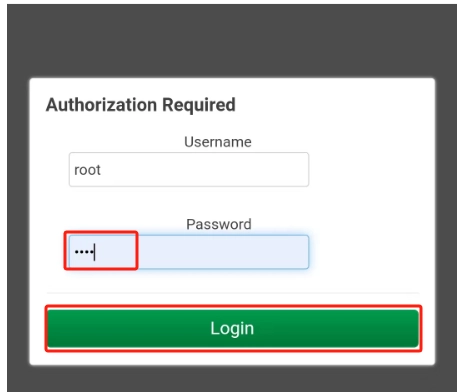
Open the browser and input 192.168.1.1, click to access the URL, and then enter the password: root to log into the Luci network configuration interface.
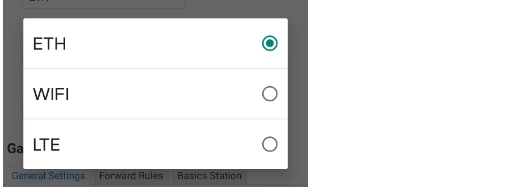
3-1 After entering Luci interface, start to configure the gateway networking network, there are three network configuration modes, divided into ETH, Wifi, LTE (4G), now start to set up the WiFi networking mode
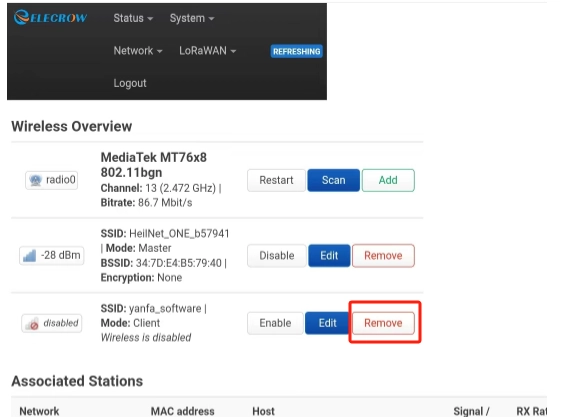
In the interface, click Network, select Wireless

Click Remove to remove the old WiFi hotspot.
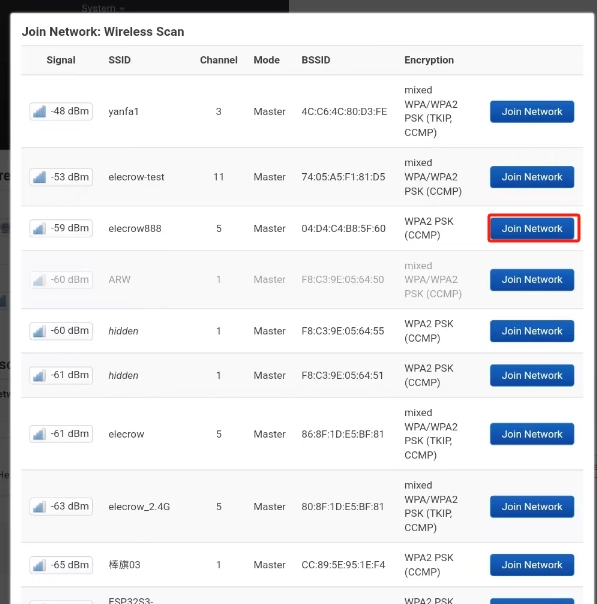
Click Scan, select the new WiFi hotspot, click Join Network, enter the WiFi password and save it!

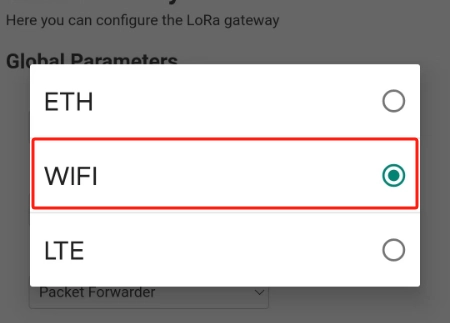
Go back to Luci start interface, select LoRa Gateway in the LoRaWAN drop-down menu, enter the gateway configuration interface.

Select Wifi.
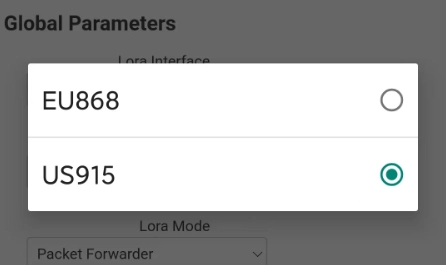
Now LoRa gateway band, according to the product selection of LoRa gateway selection
Input the gateway ID, this ID needs to be registered in TTN server website.
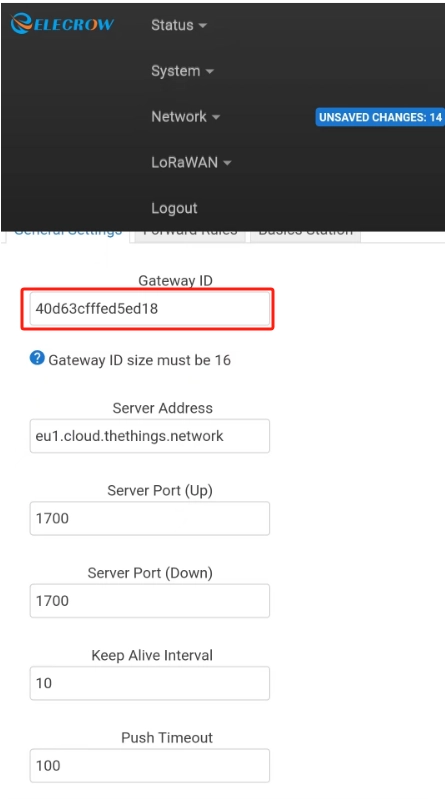
Other settings use the default settings
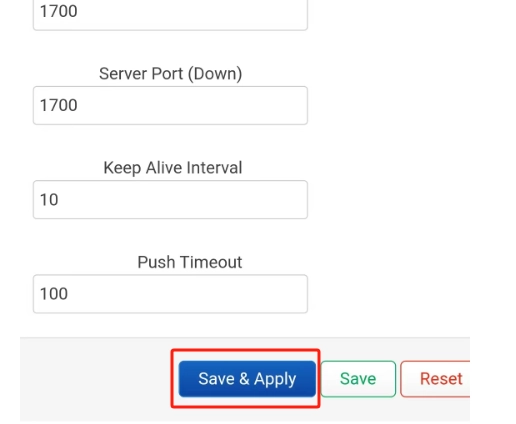
Click Save&Apply, then exit Luci website and wait for the gateway to restart!
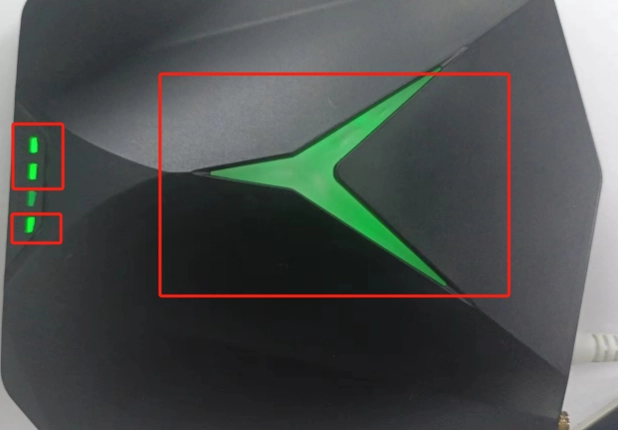
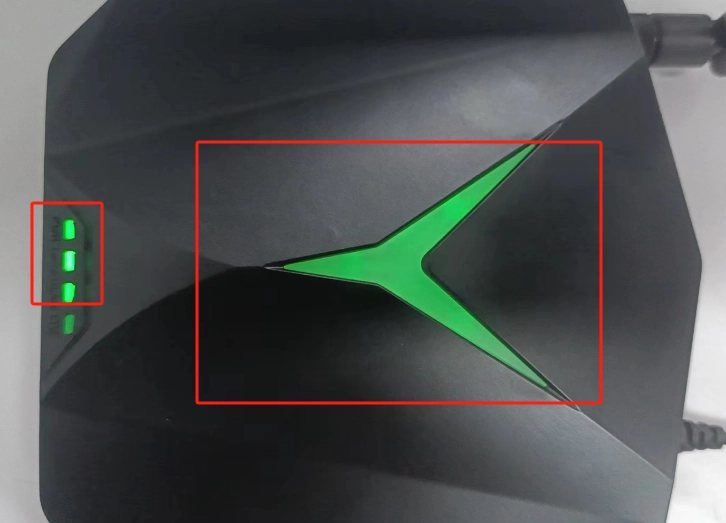
Press the Gateway Side Settings button twice consecutively for a quick reboot of the gateway! Wait until the WLAN and LORA green LEDs on the gateway light up, and the status LED in the center turns green, indicating that the gateway network has been successfully configured and the gateway is functioning normally!
Setting
Press the Setup button twice consecutively

Gateway normal operation LED light status, WLAN,LORA indicator, and the center big status light is green always on!
3-2 Gateway ETH Networking Configuration
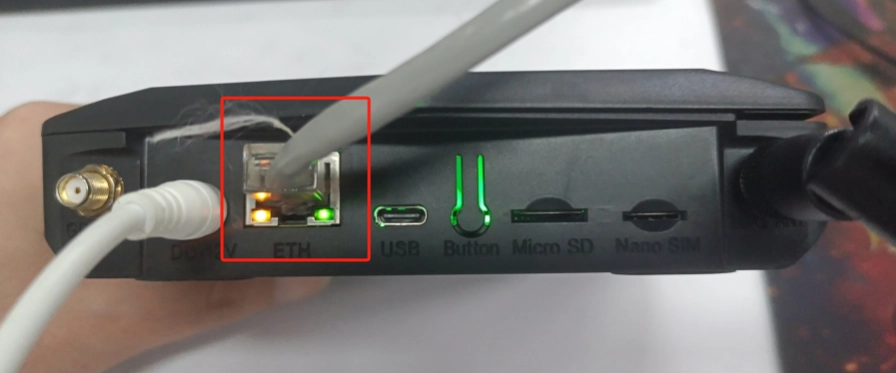
You need to use the network cable to connect to the network port on the side of the gateway, and then press and hold the setup button for 5S, after connecting to the AP, log in to the Luci interface, as you don't use the WIFI network, so you don't need to enter into the Network to set up the WIFI, and this step can be directly skipped, and you can directly enter into the initial interface of the LoRa Gateway in the LoRaWAN pull-down menu, and enter into the gateway configuration interface, and choose ETH. Enter the gateway configuration interface, select ETH networking mode, save it, exit Luci and wait for the gateway to restart!
Long press the setup button for 5S

The gateway enters the configuration state
Connect to the network cable
Log in Luci interface, select LoRa Gateway in the drop-down menu of LoRaWAN, enter the gateway configuration interface, select ETH networking mode.
Click Save&Apply, then exit the Luci website and wait for the gateway to reboot! After reboot, WLAN, LORA indicator, the center big status light is always on green! This indicates that the gateway is operating normally!

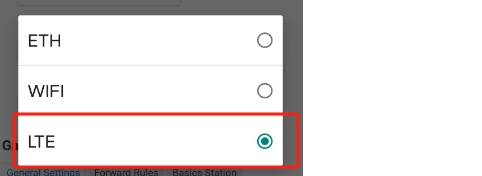
3-3 Gateway LTE (4G) Networking Configuration
To use 4G networking, you need to insert a SIM-4G phone card into the SIM card slot on the side of the gateway.

Refer to 3-1,3-2 configuration steps, in the initial interface of Luci LoRaWAN drop-down menu in the LoRa Gateway, enter the gateway configuration interface, select LTE networking mode, save, exit Luci, wait for the gateway to reboot!
When the gateway uses 4G network, under normal operation, the LTE indicator on the gateway is flashing, the LORA indicator is always on, and the status indicator is always on!